Translations Contribution Guide
A step-by-step guide for contributors helping make climate information accessible in multiple languages.
Project link: crowdin.com/project/nmhs-cms
Part 1 — Getting Started
Step 1: Create a GitHub Account
Contributors are encouraged to sign in to Crowdin using GitHub. If you don’t have a GitHub account yet, here’s how to create one:
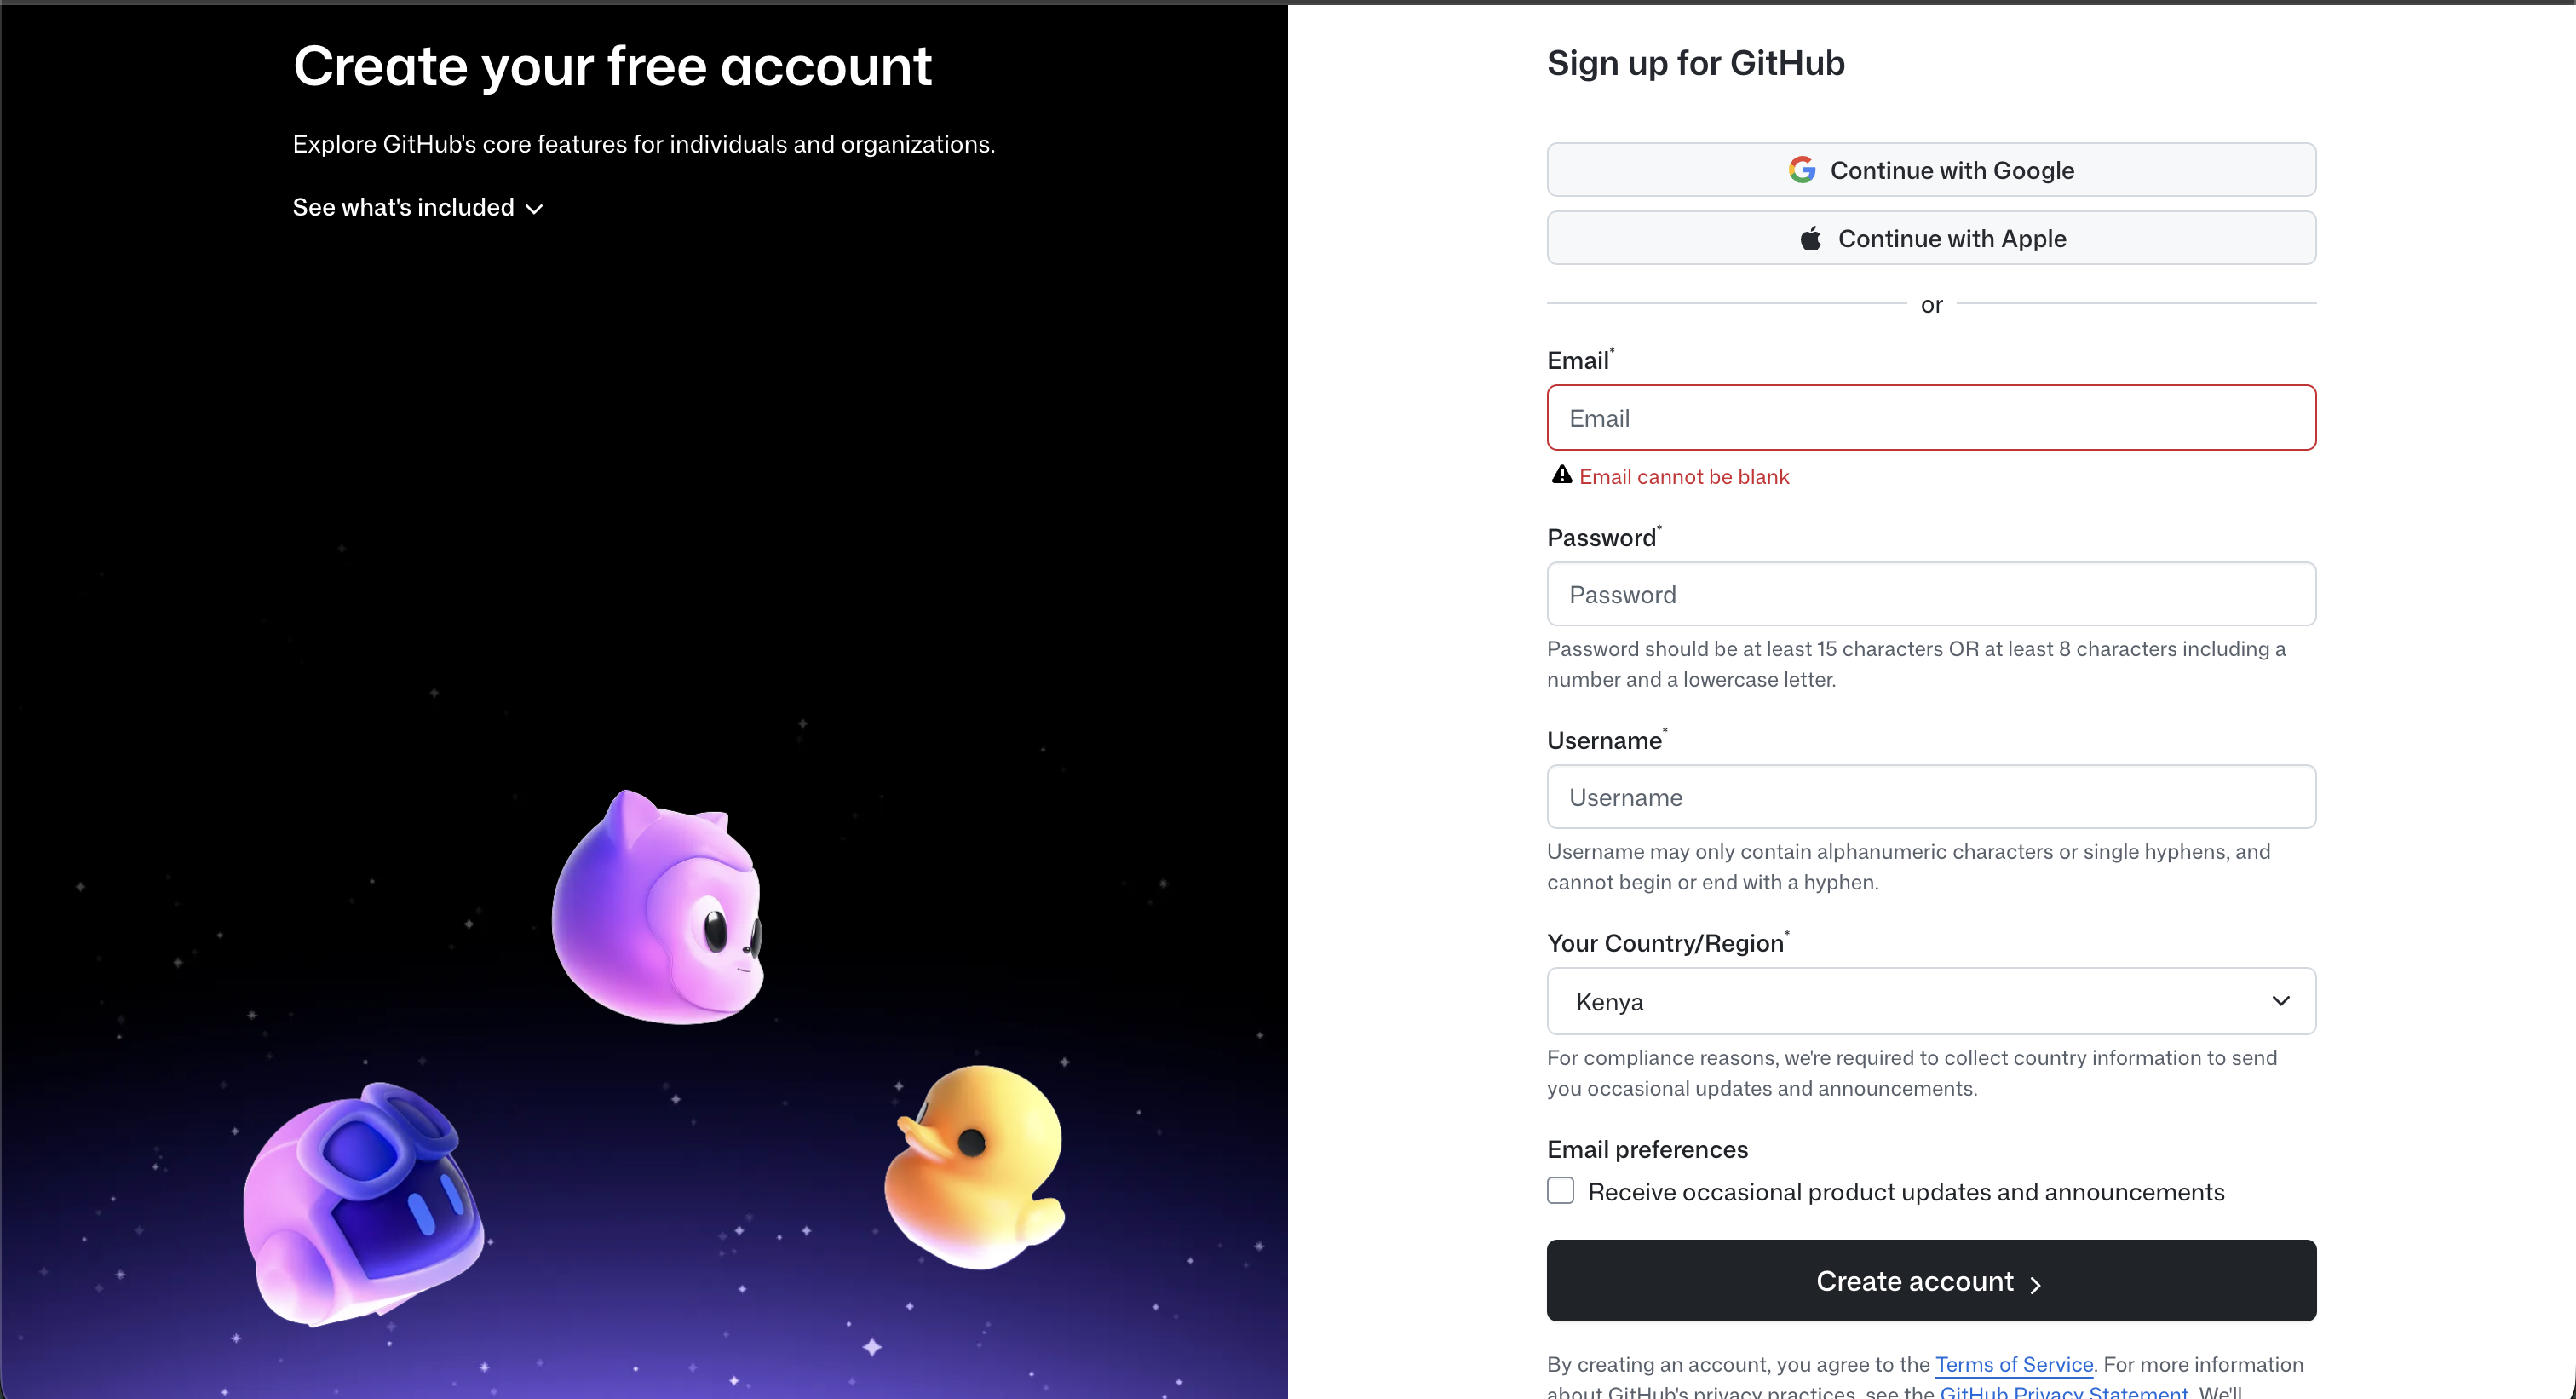
Go to github.com and click Sign up in the top-right corner.

Enter your email address and click Continue.
Create a password and click Continue.
Choose a username — this will be your public identity on GitHub.
Complete the short verification puzzle to confirm you’re human.
Click Create account. GitHub will send a verification code to your email — enter it to activate your account.
On the welcome screen, you can skip the optional setup questions by scrolling down and clicking Skip personalisation.
Tip: Choose a username that represents you professionally — it will be visible to other contributors on the ClimWeb project.
You now have a GitHub account and are ready to sign in to Crowdin!
Step 2: Create a Crowdin Account via GitHub
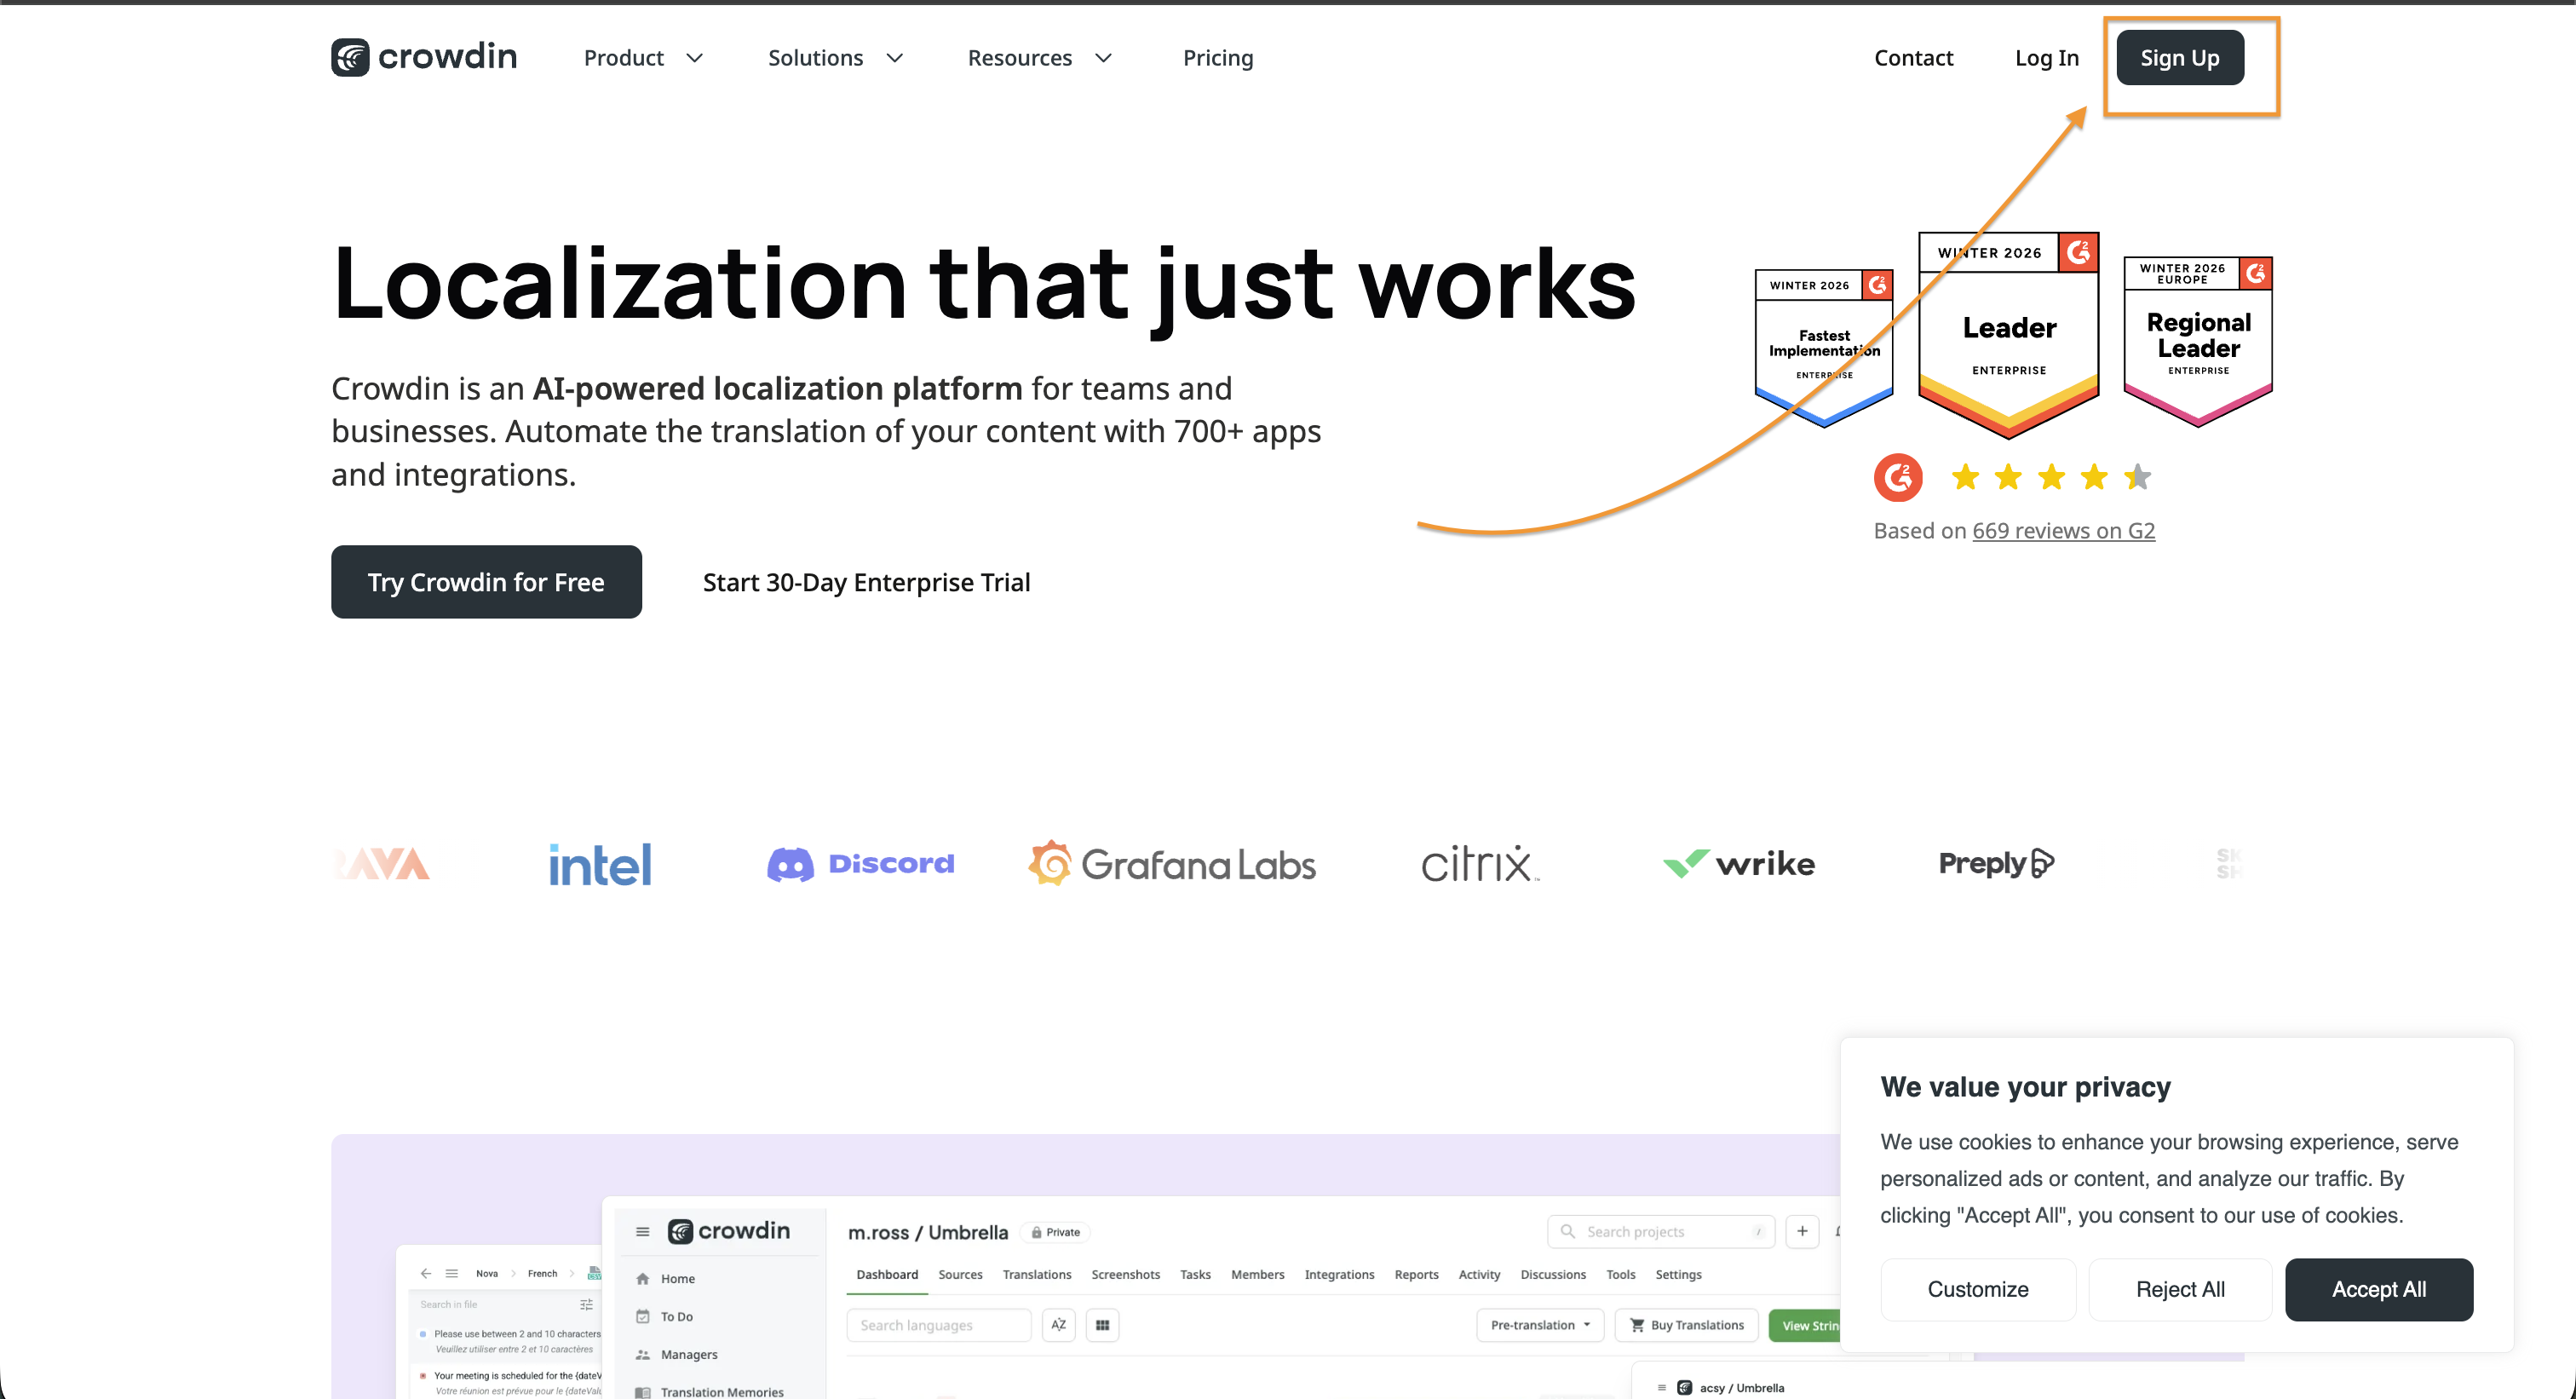
Go to crowdin.com and click Sign Up. On the signup page, select Continue with GitHub instead of filling in the email form.
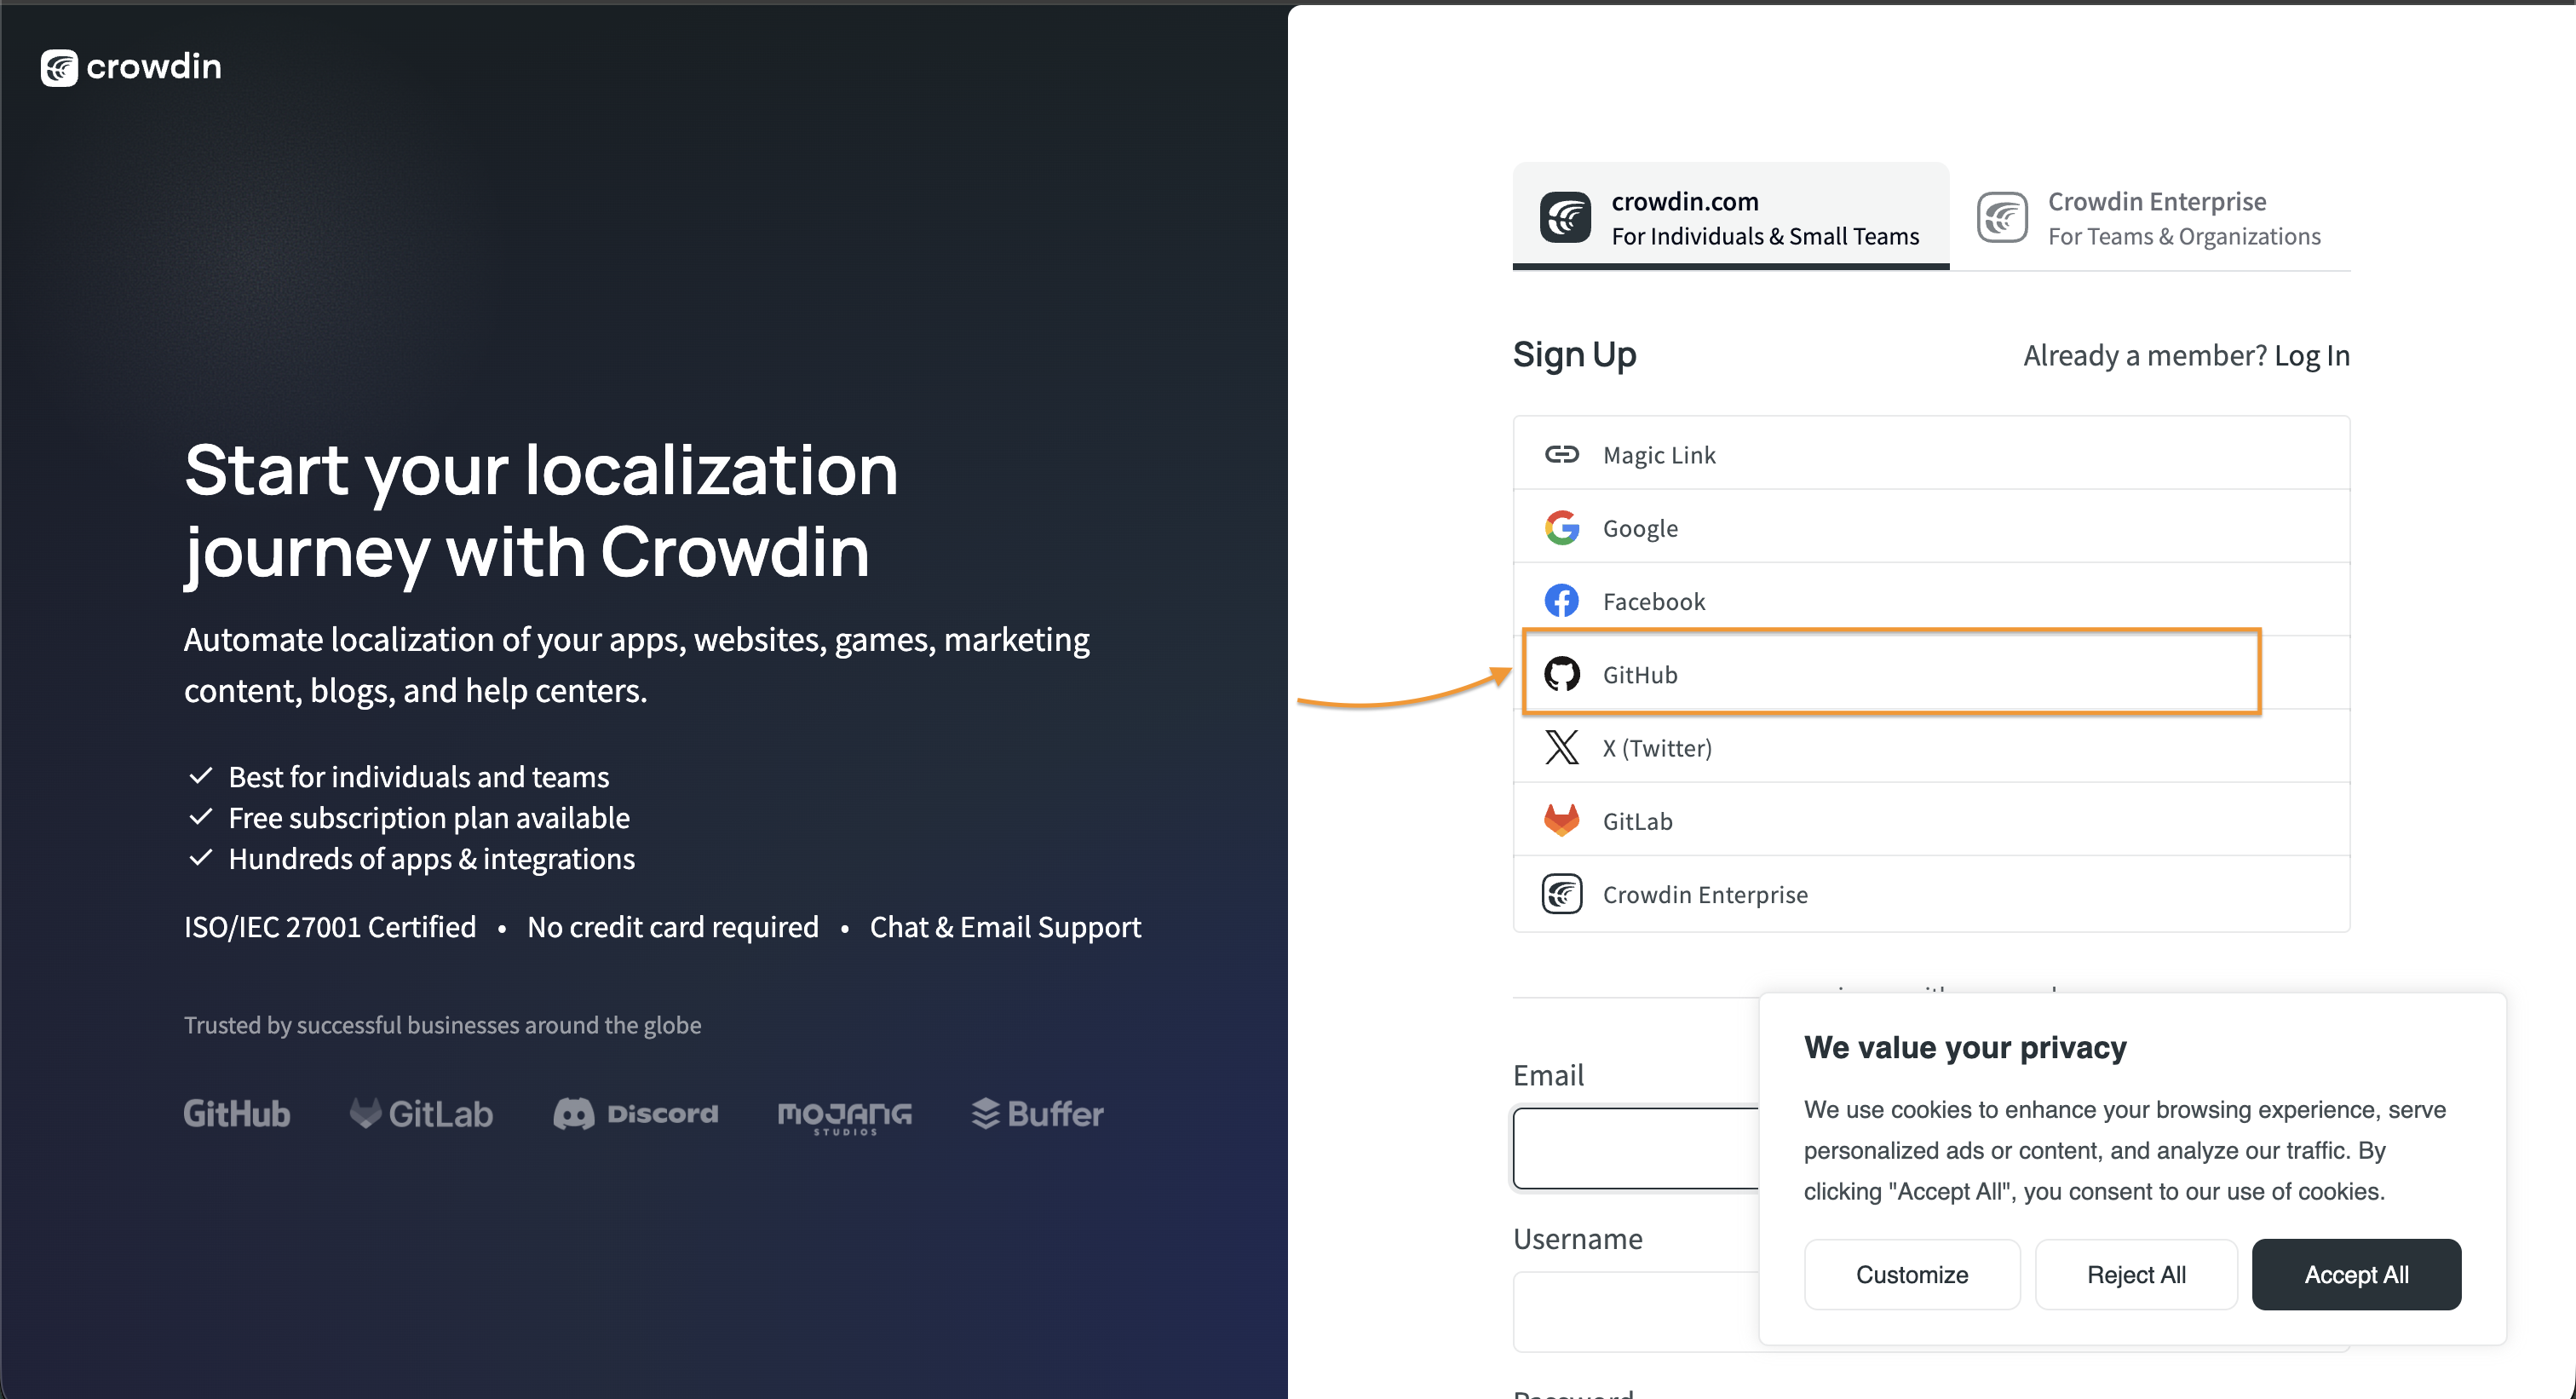
GitHub will ask you to authorise Crowdin — click Authorize crowdin to allow the connection. You’ll be redirected back to Crowdin with your account ready to use.
Once signed in, go to your Account Settings (click your profile picture in the top-right corner) to set your preferred languages — this helps Crowdin show you relevant projects.
Step 3: Join the ClimWeb Project
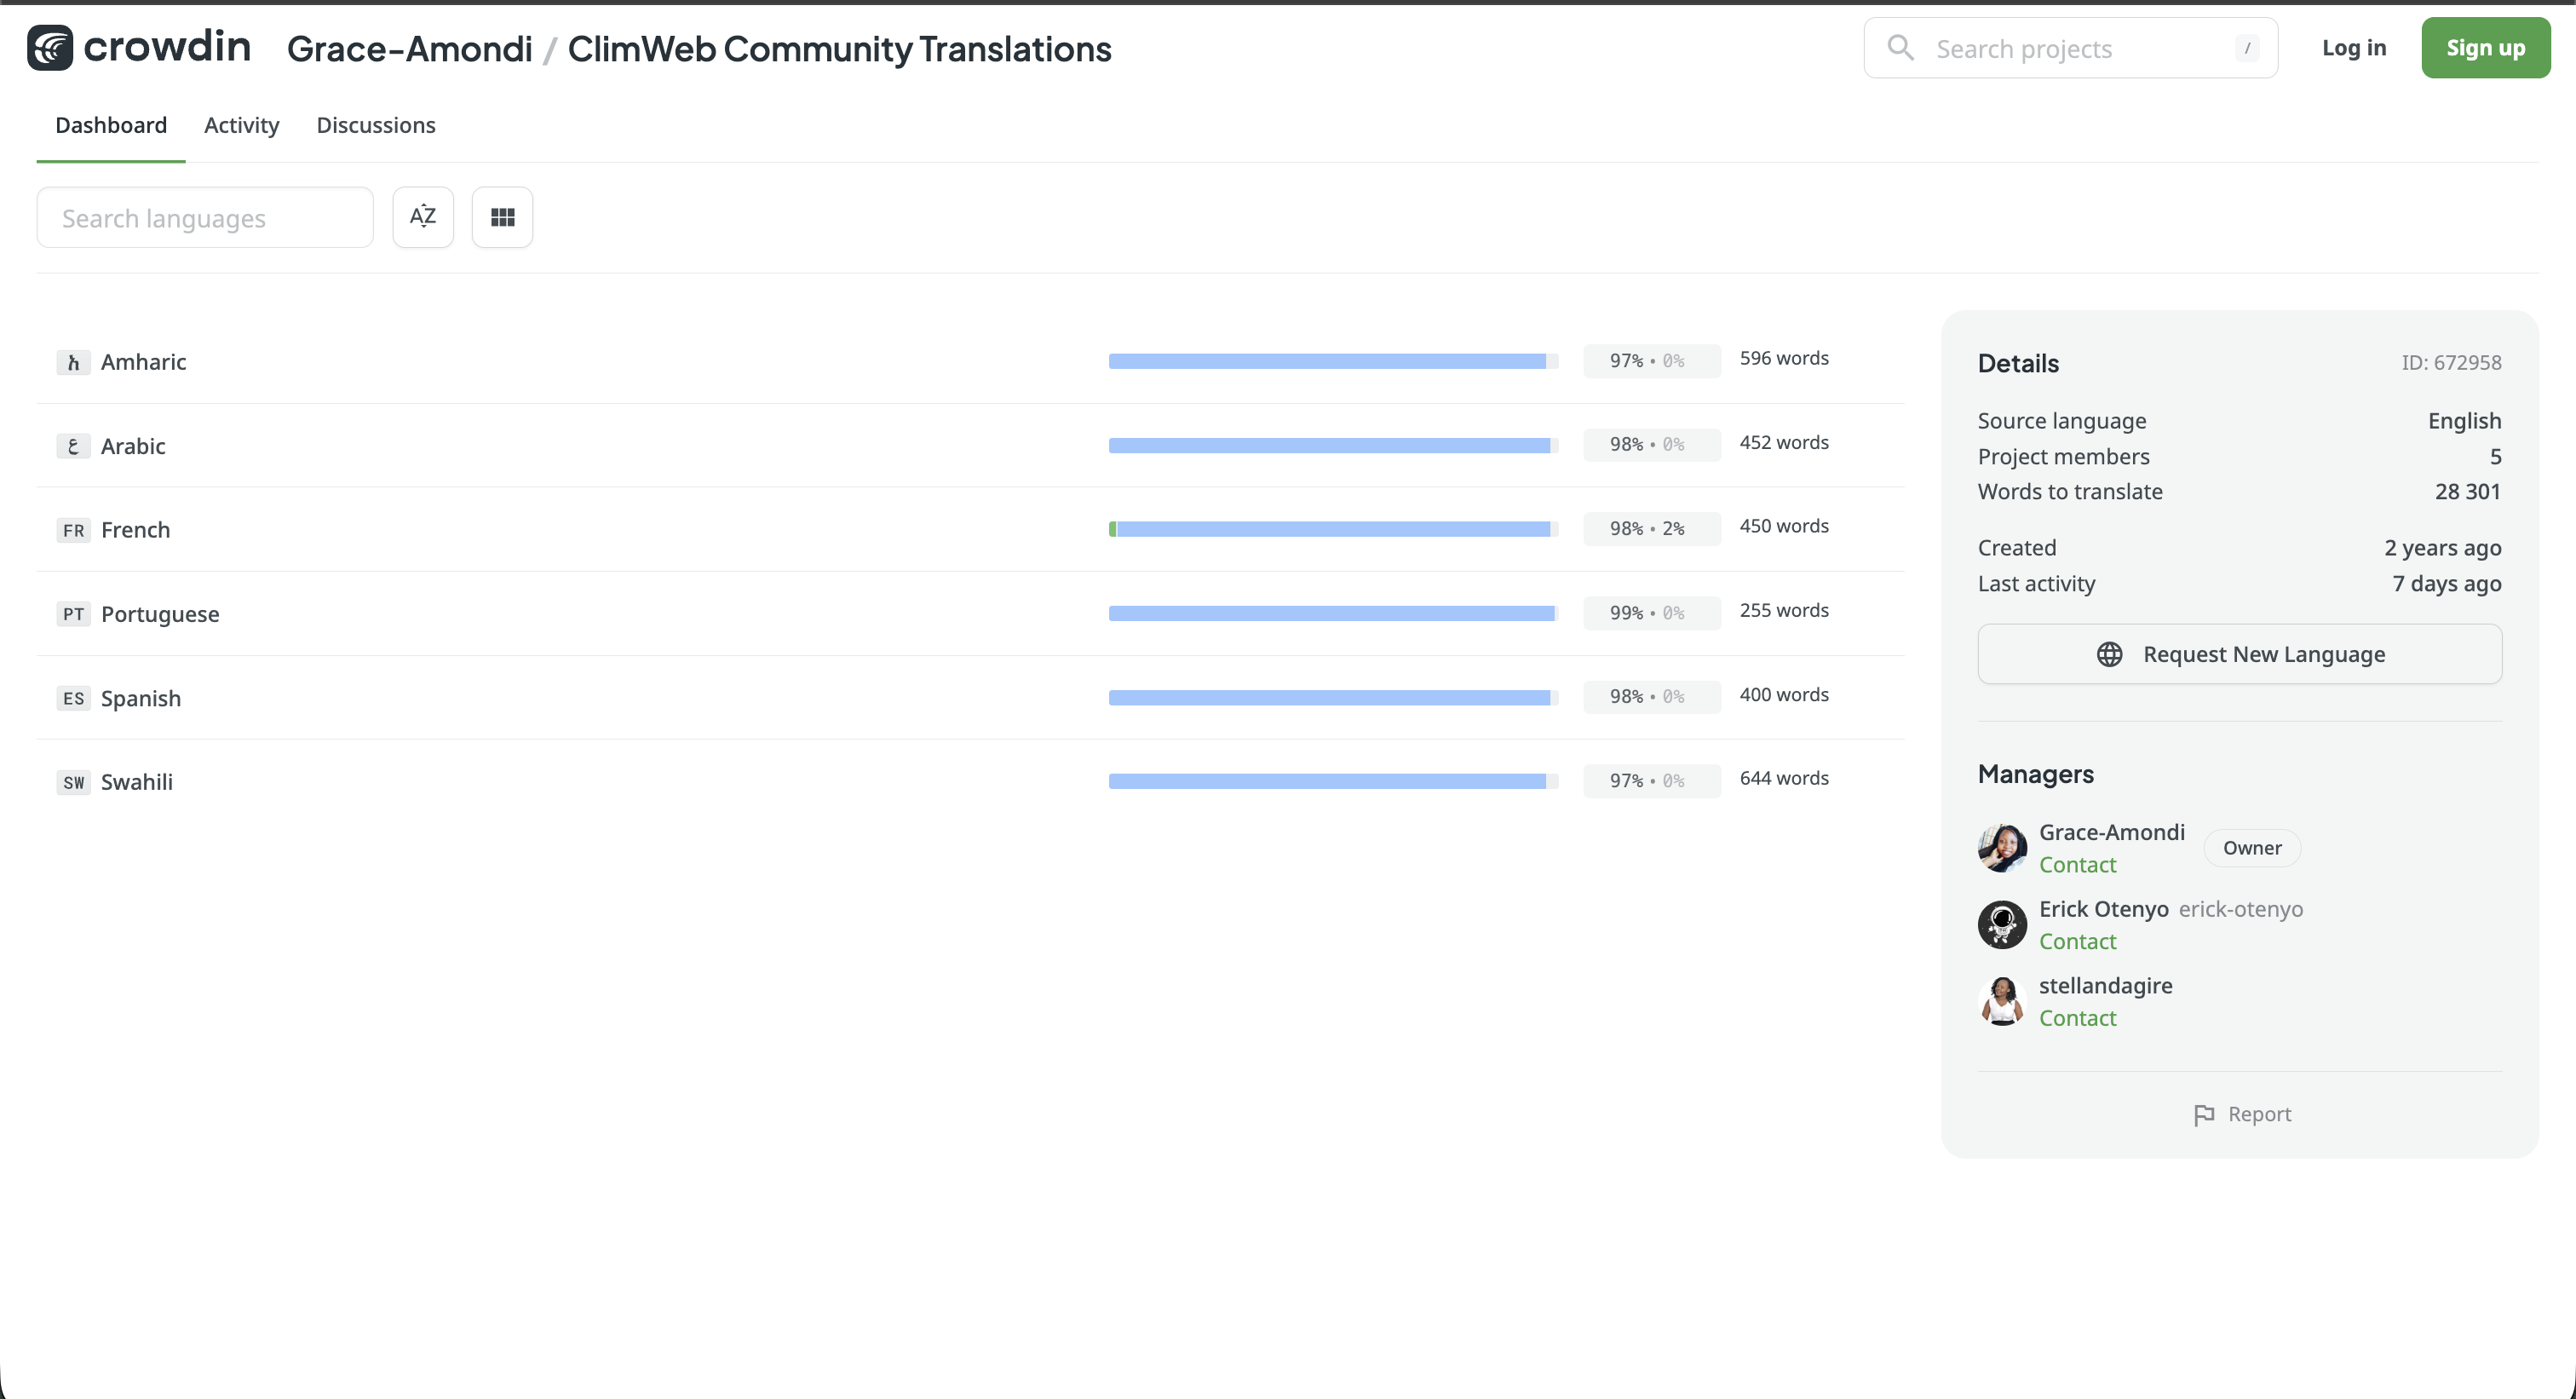
Visit the ClimWeb Community project directly at: crowdin.com/project/nmhs-cms
On the project Dashboard, you’ll see all available languages and their current translation progress. Click on your language to get started.
Note: Some languages may require you to click Join and wait for a project manager to approve your request before you can begin translating.
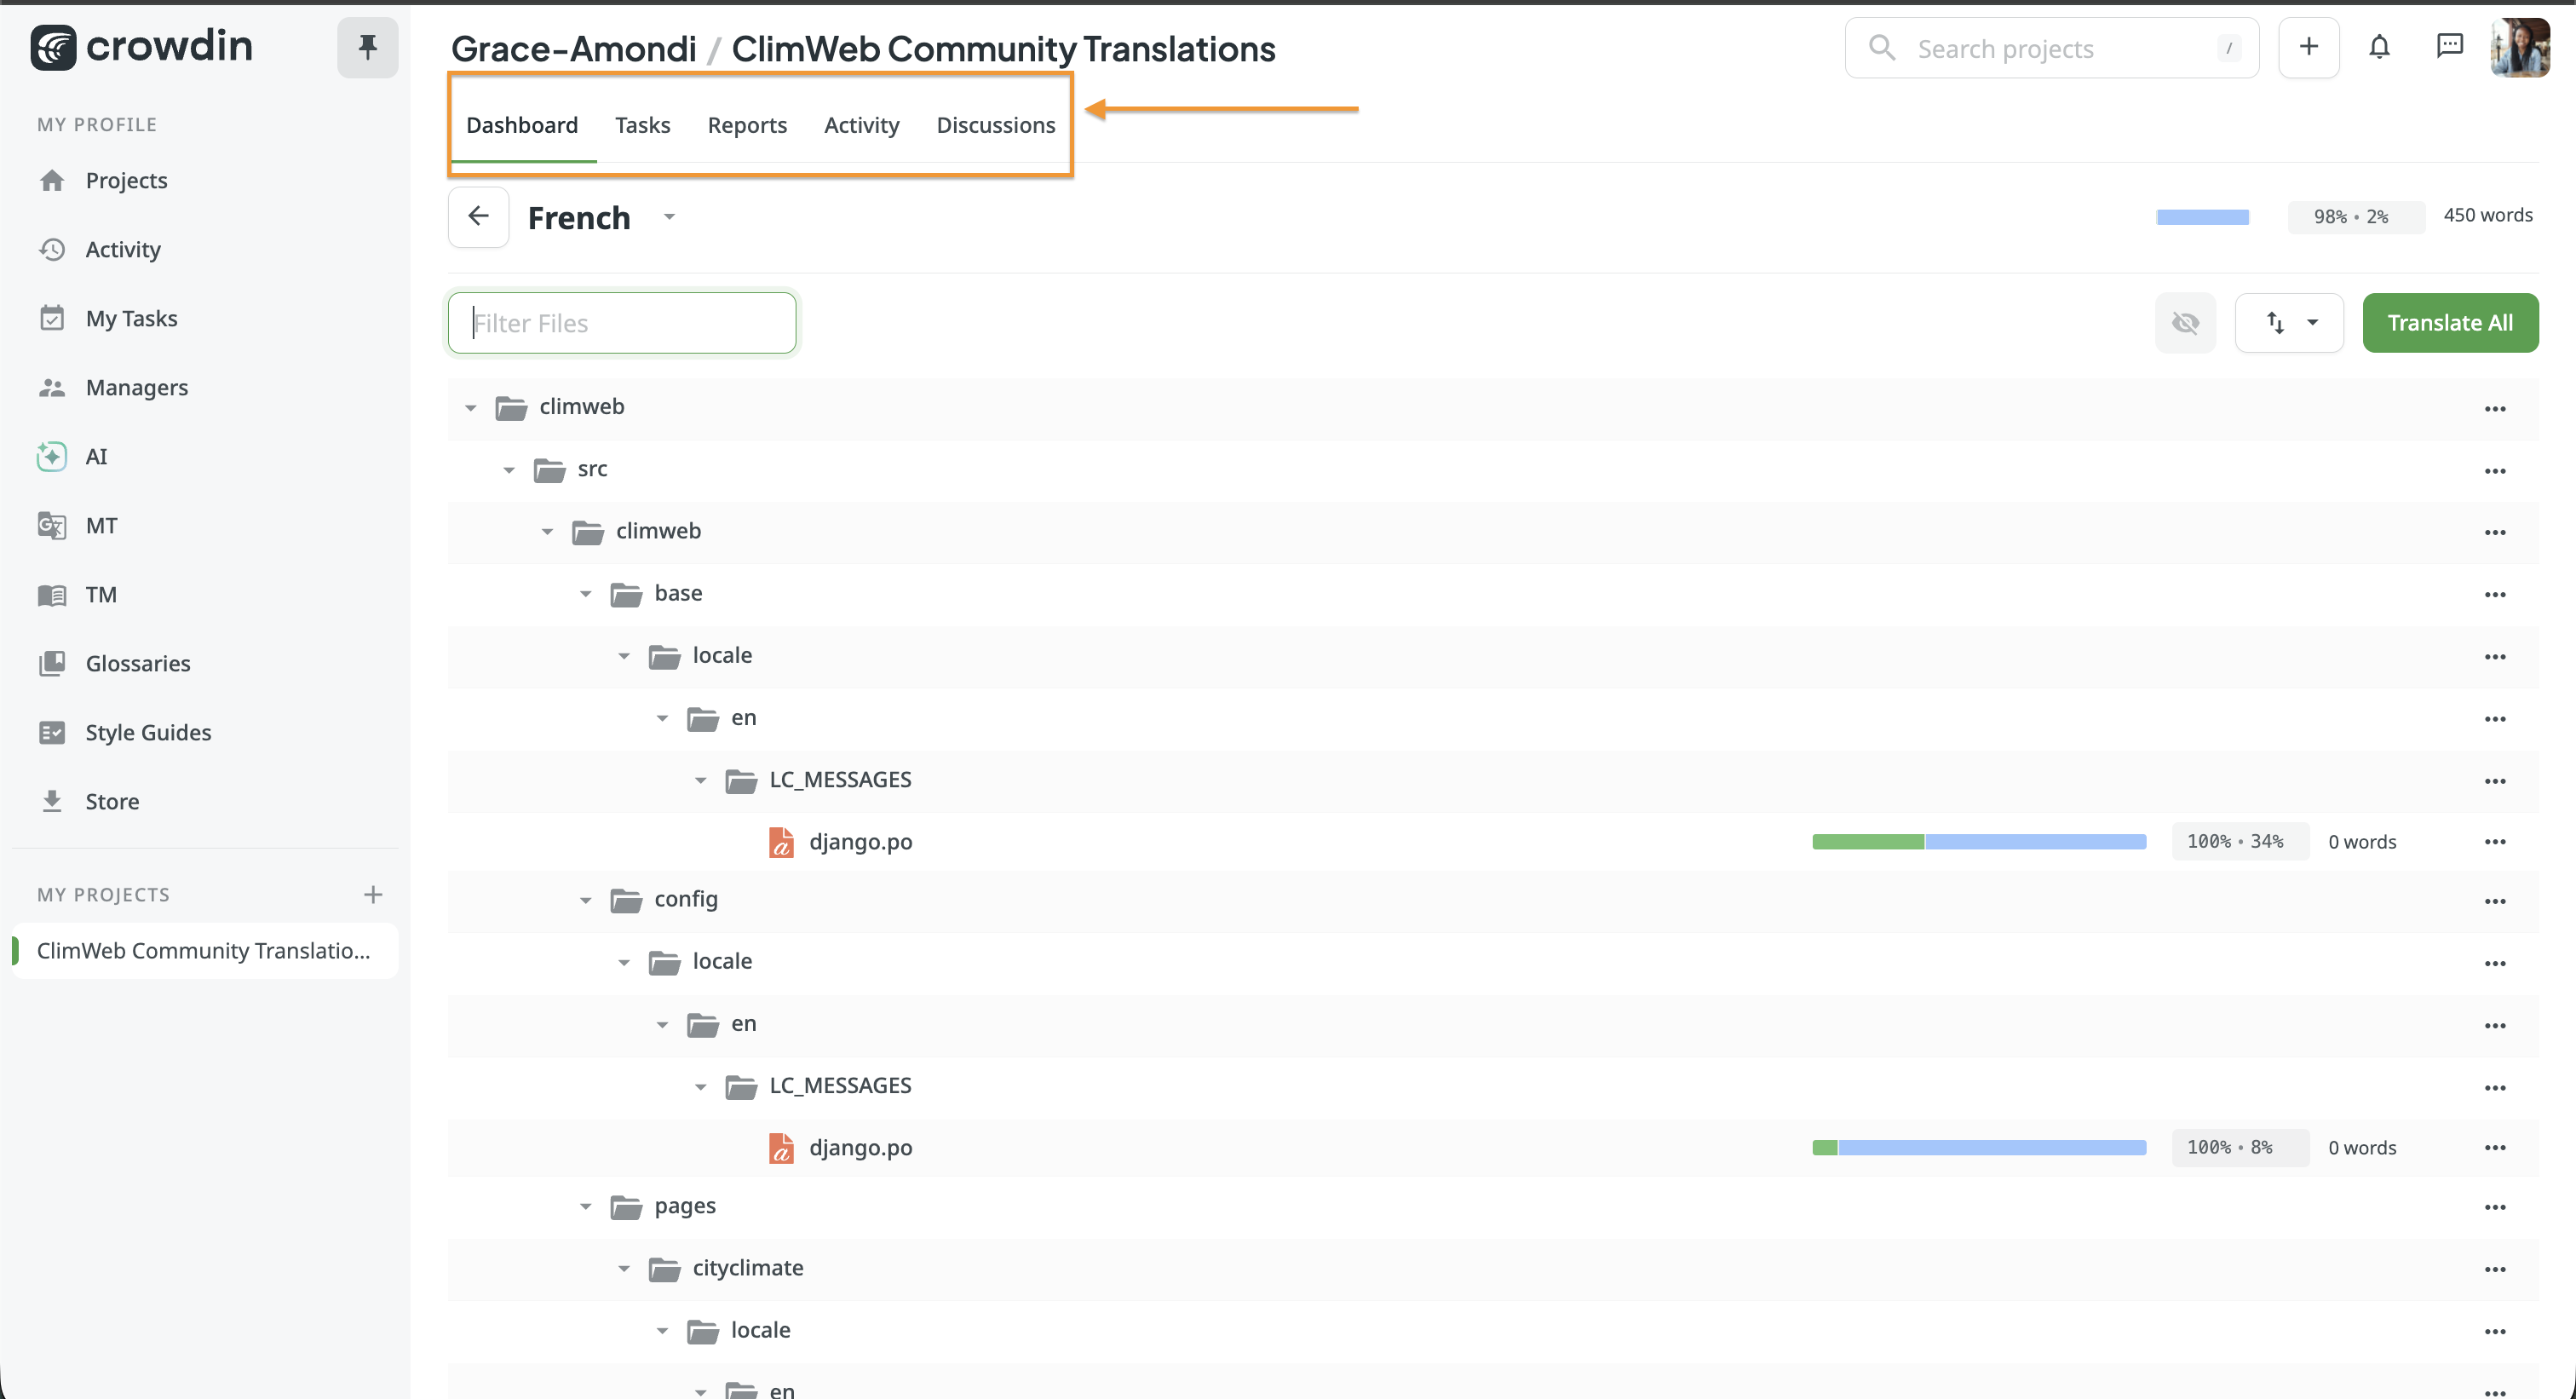
Step 4: Explore the Project Dashboard
The project Dashboard has several tabs you should know:
Tab |
What it’s for |
|---|---|
Dashboard |
Overview of languages, progress, and project details |
Tasks |
Any specific translation tasks assigned to you |
Reports |
Your personal contribution statistics |
Activity |
A live feed of what’s happening across the project |
Discussions |
A space to ask questions and collaborate with other translators |
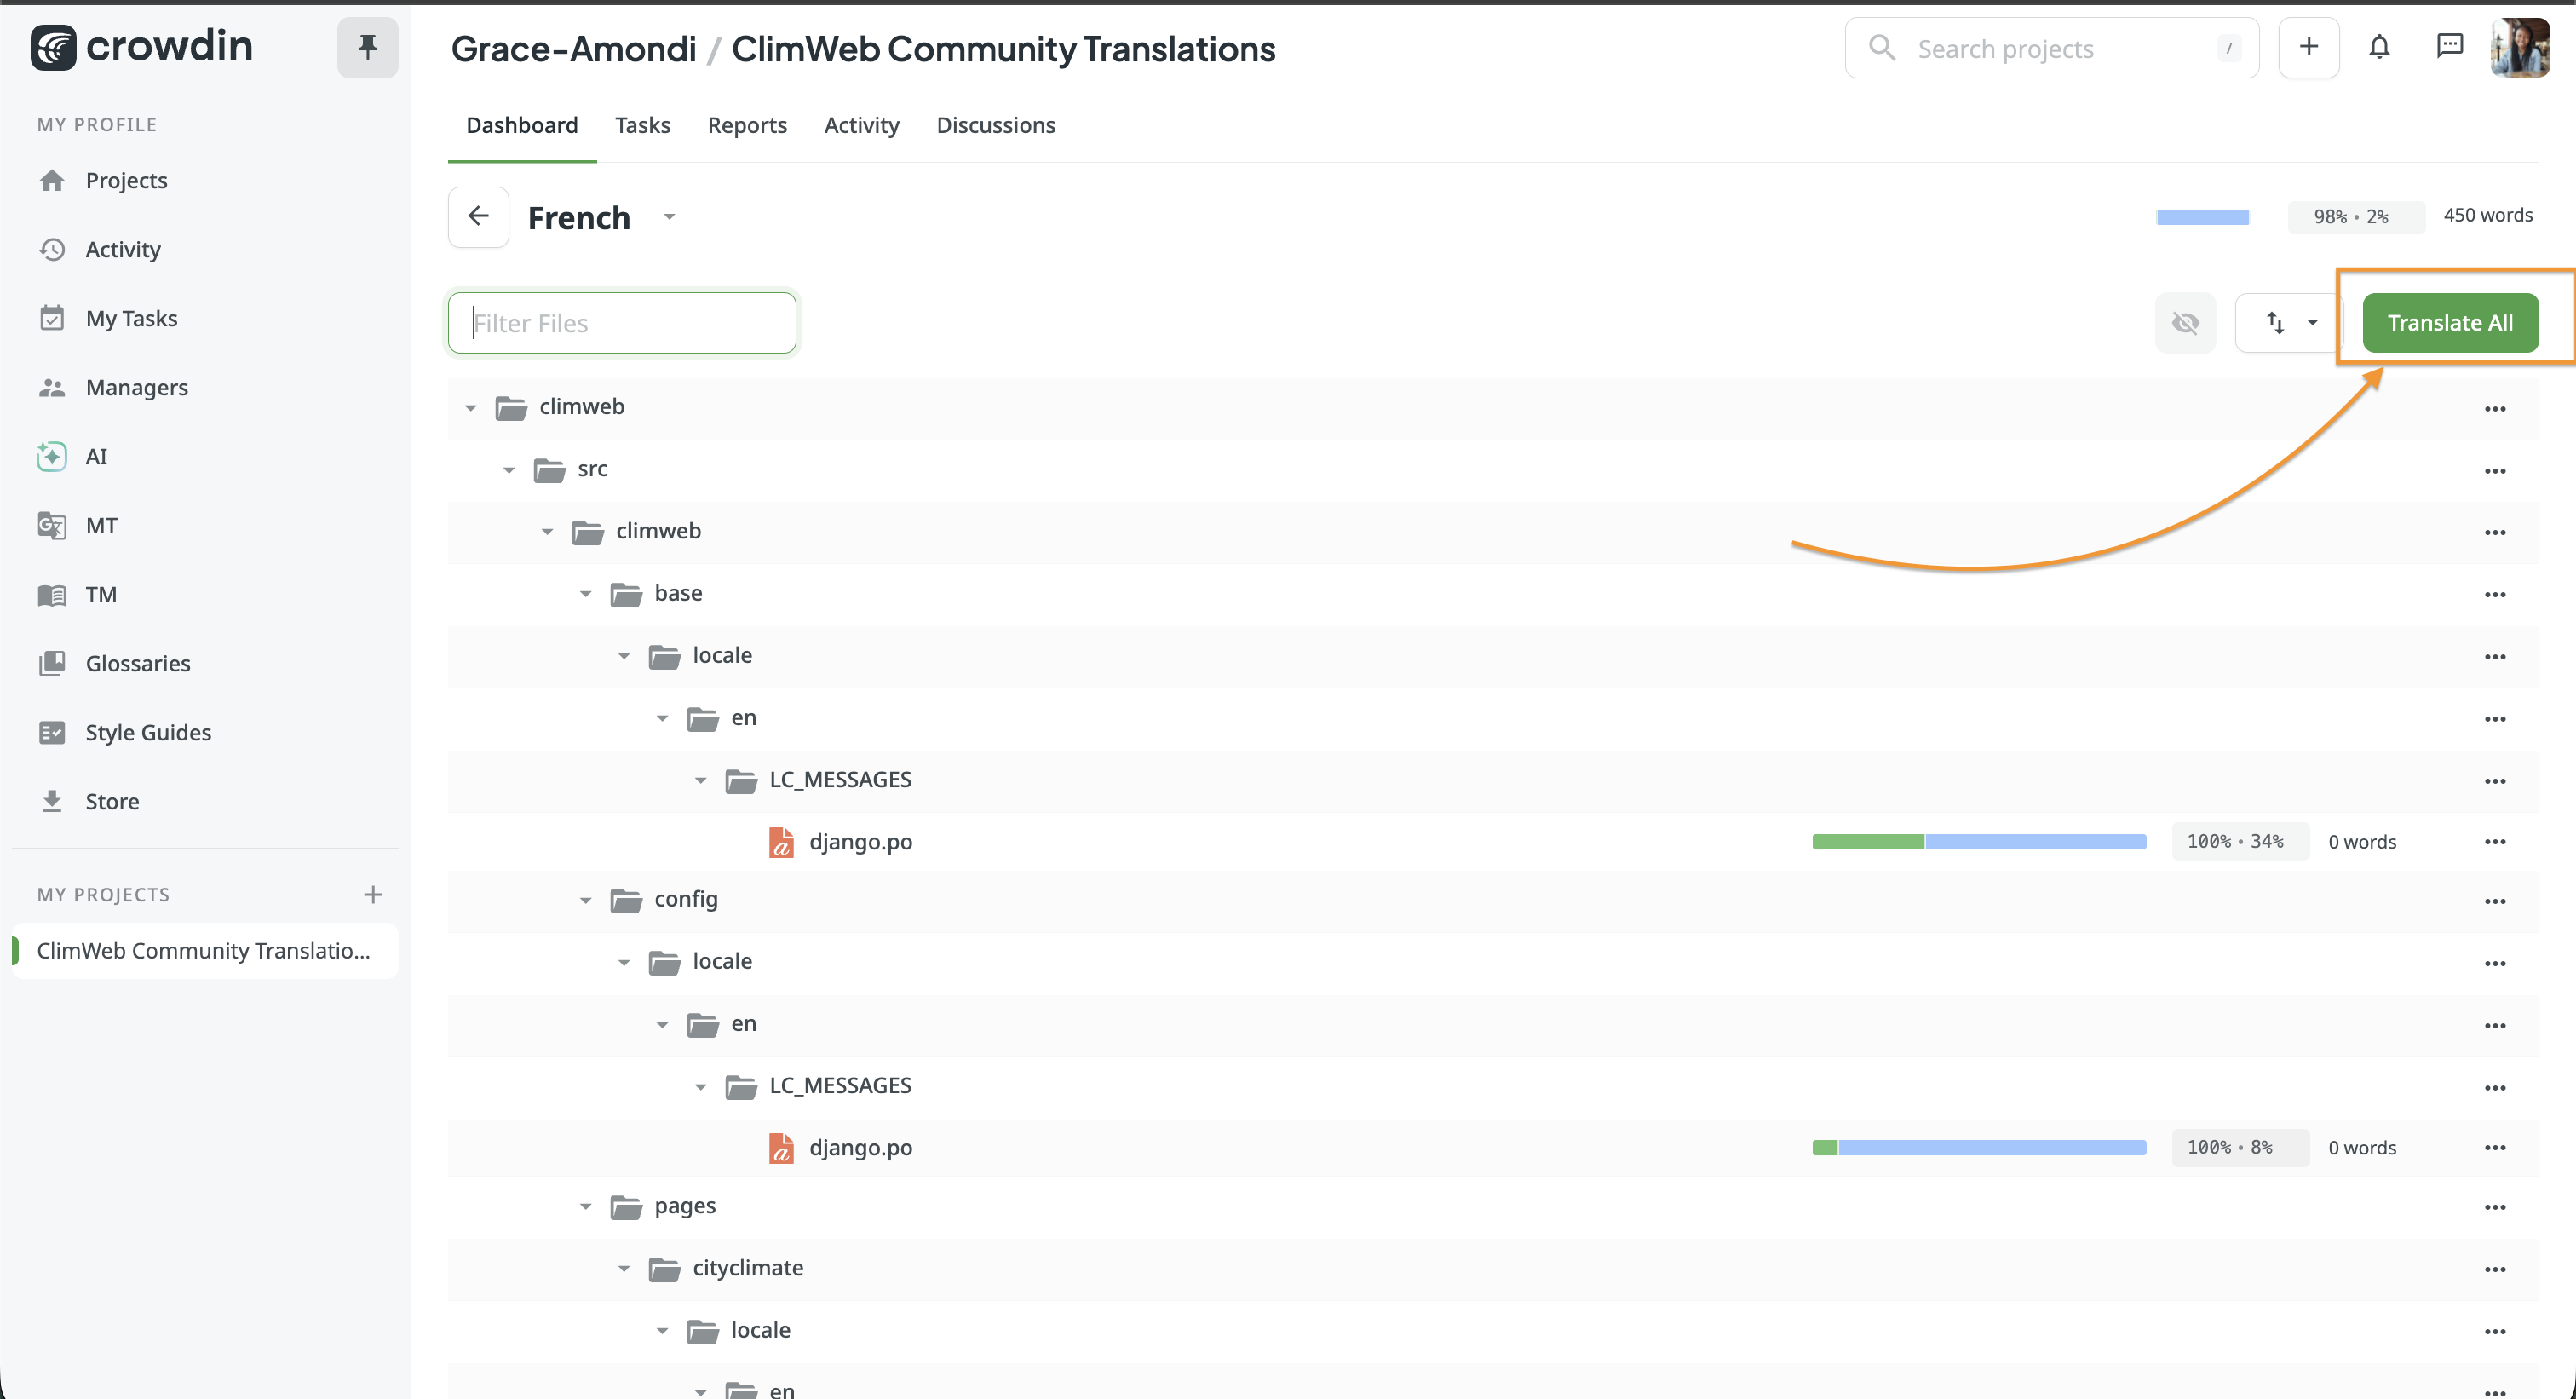
Click on your language, then select a file or click Translate All to open the editor.
Part 2 — Translating in the Editor
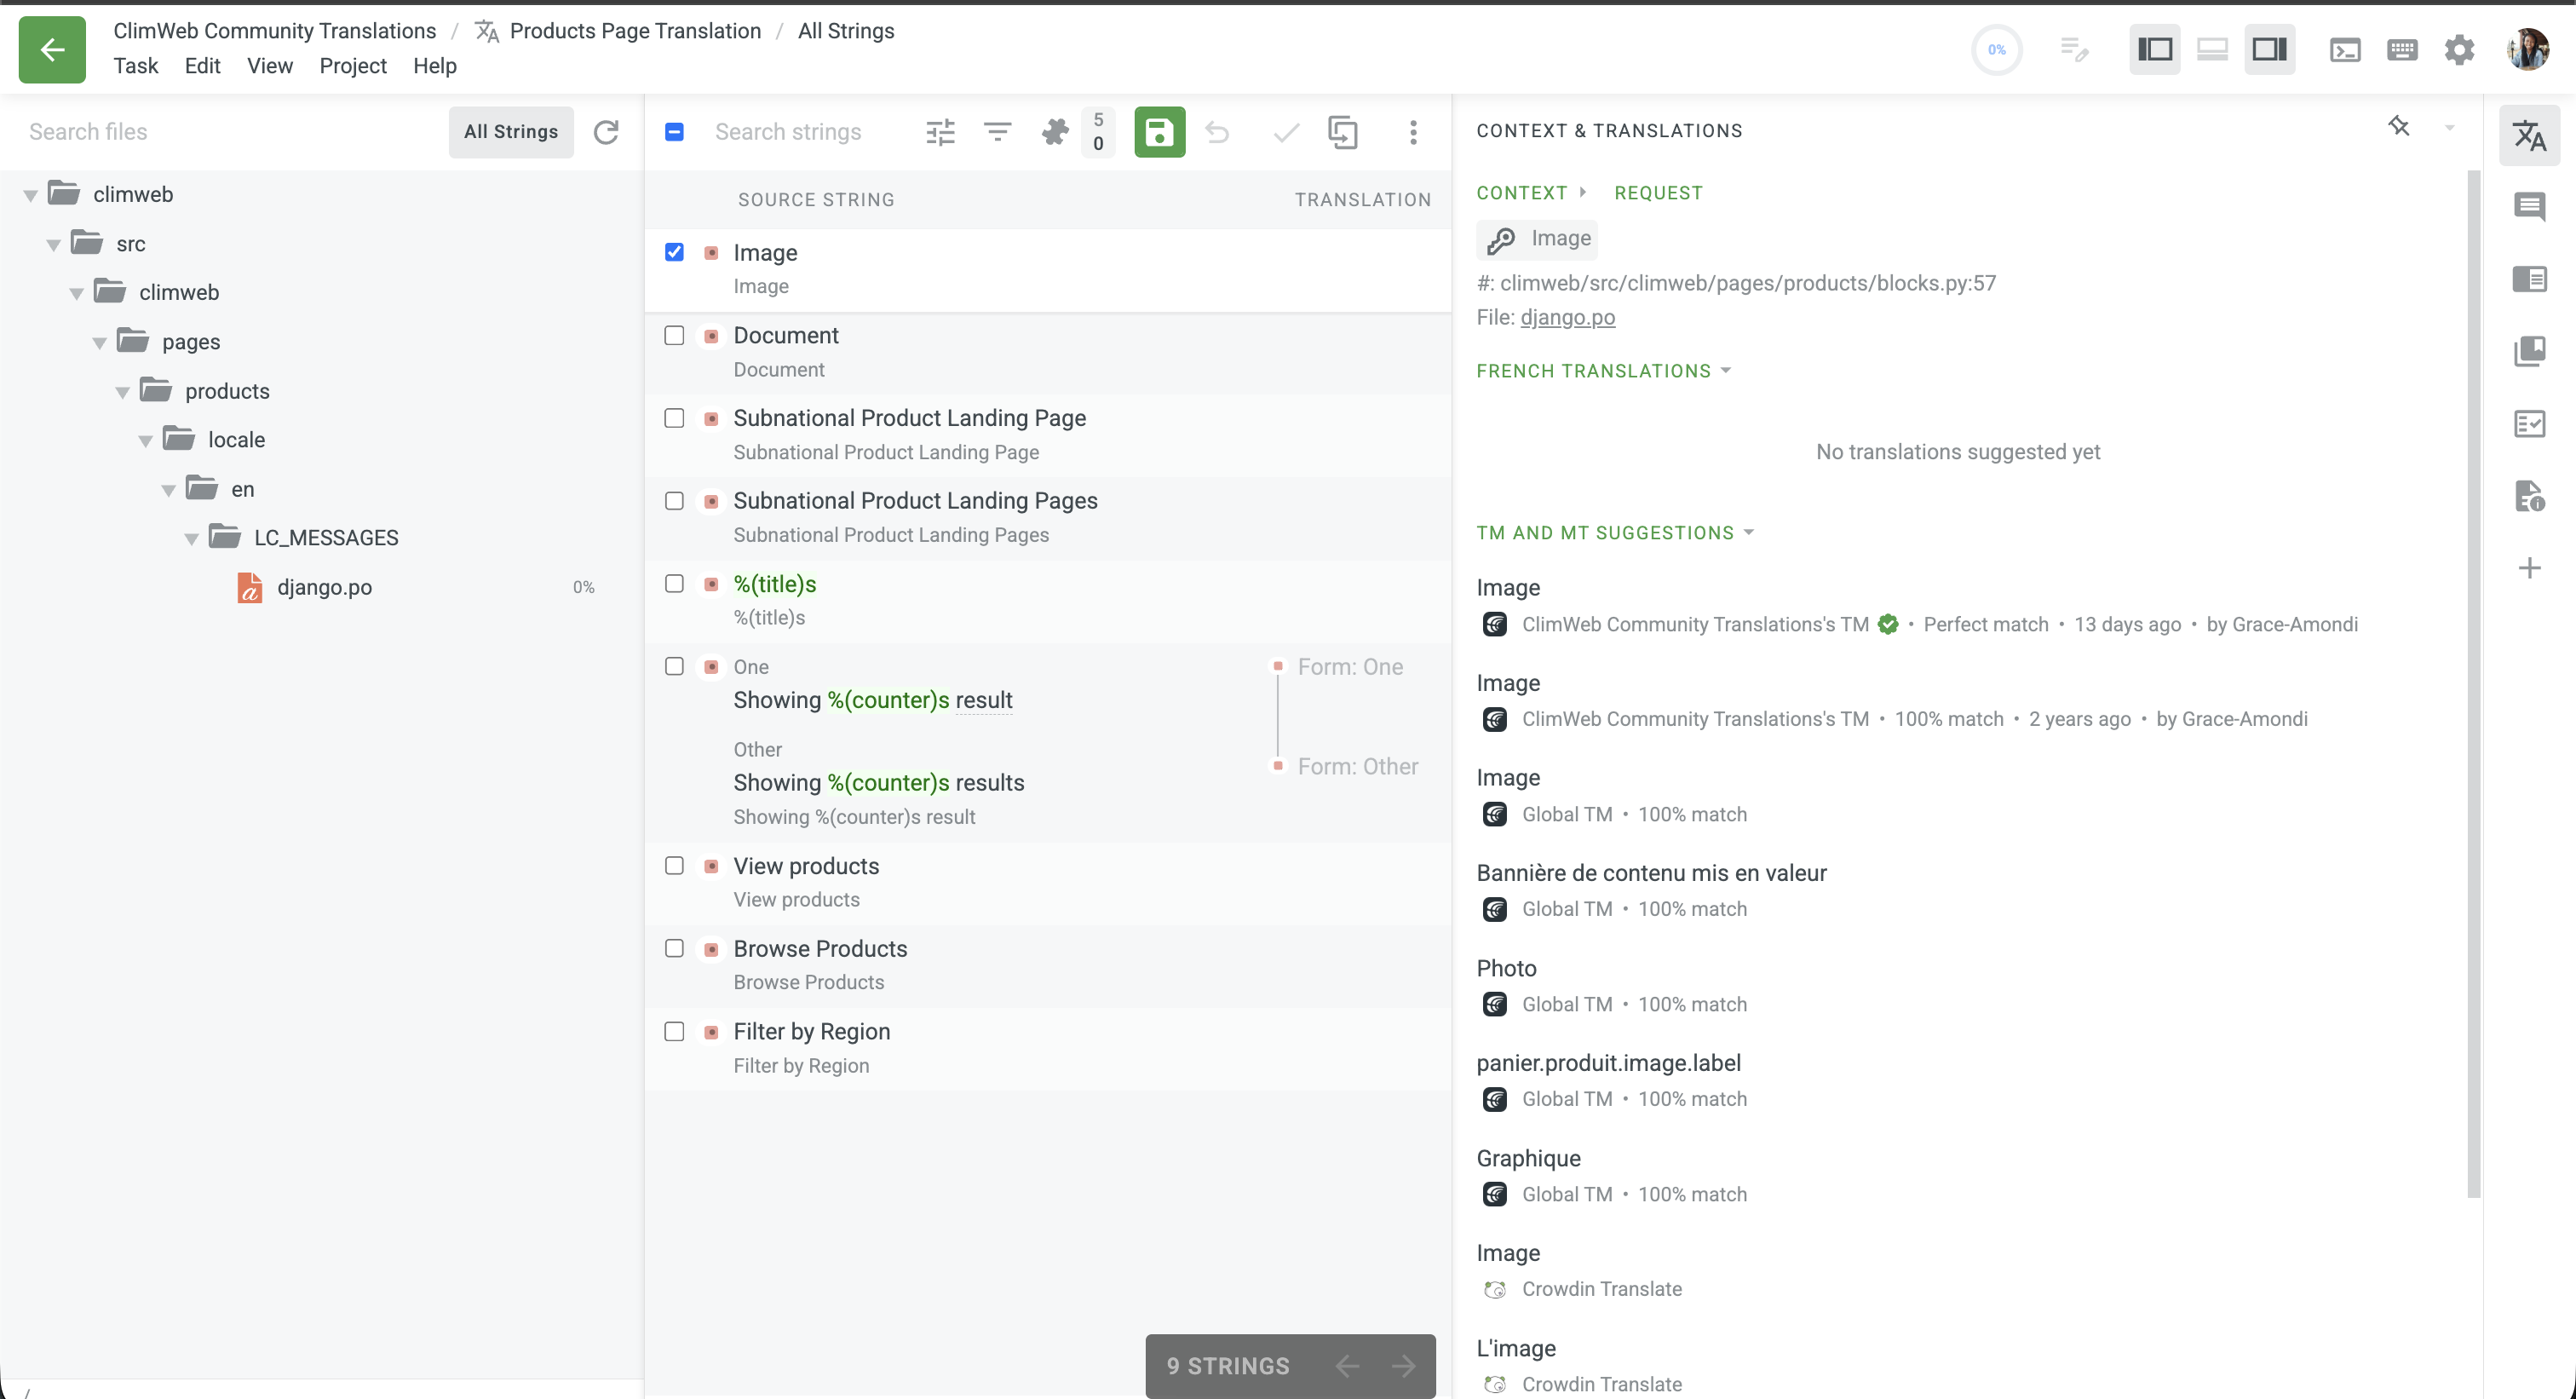
The Crowdin editor has three main panels:
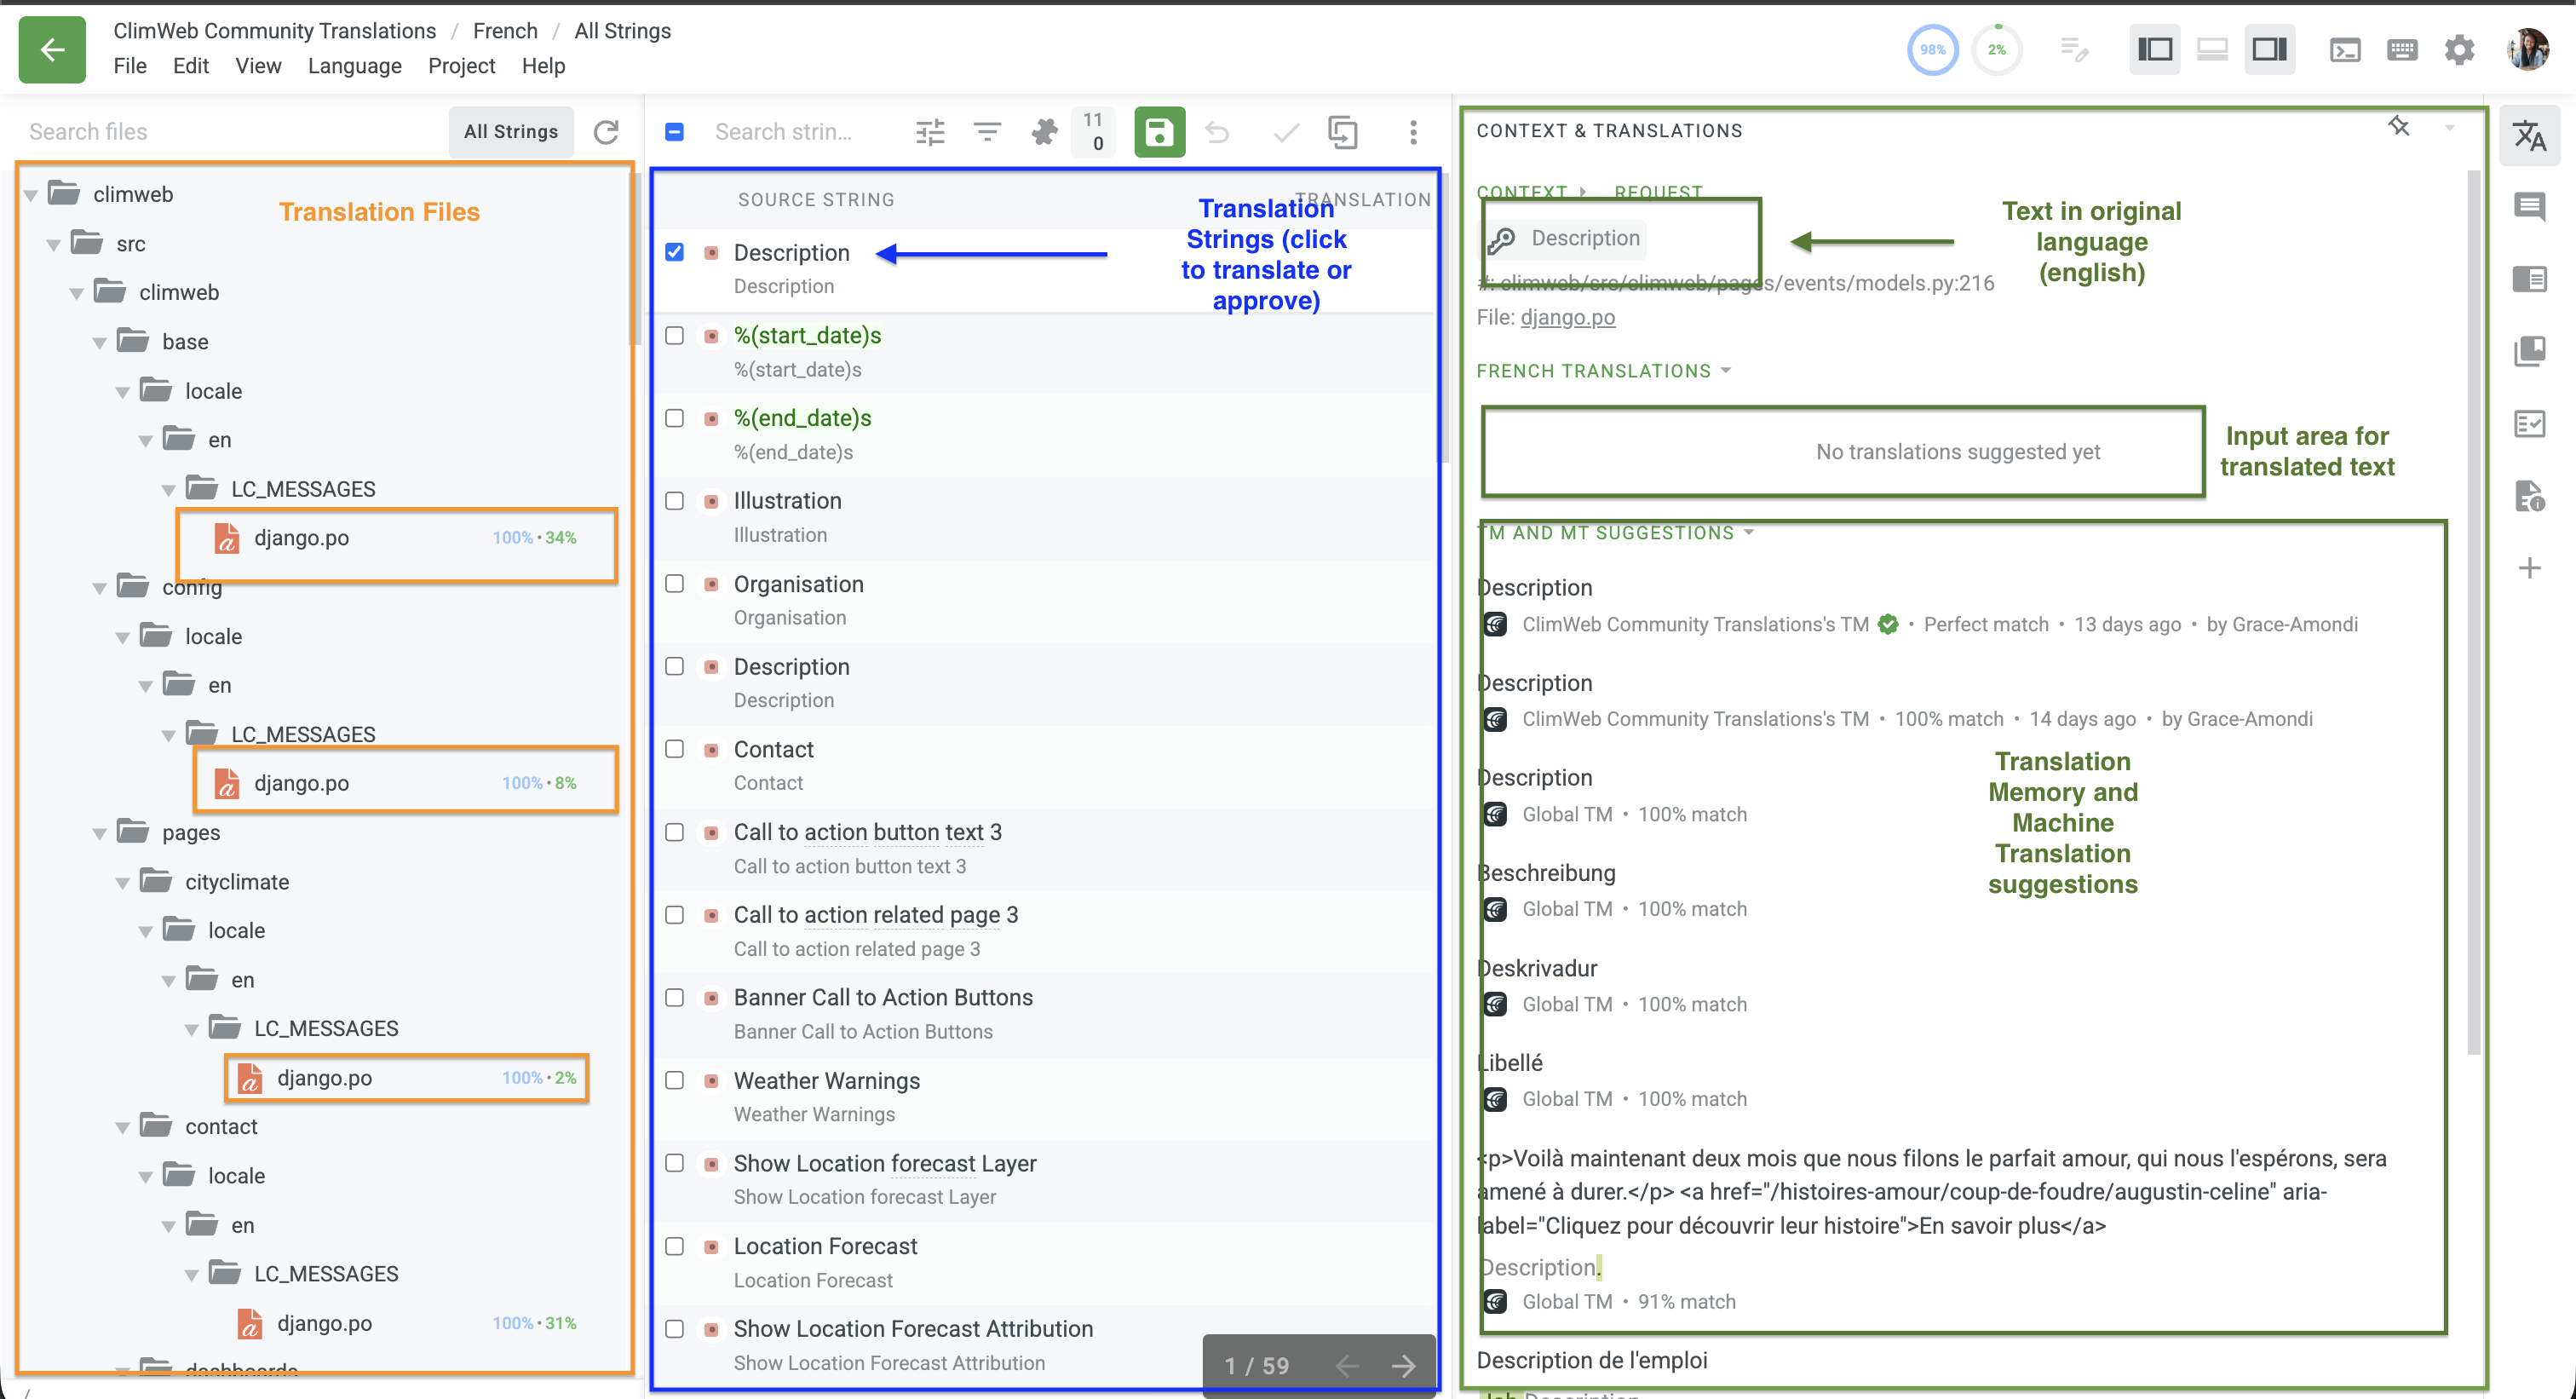
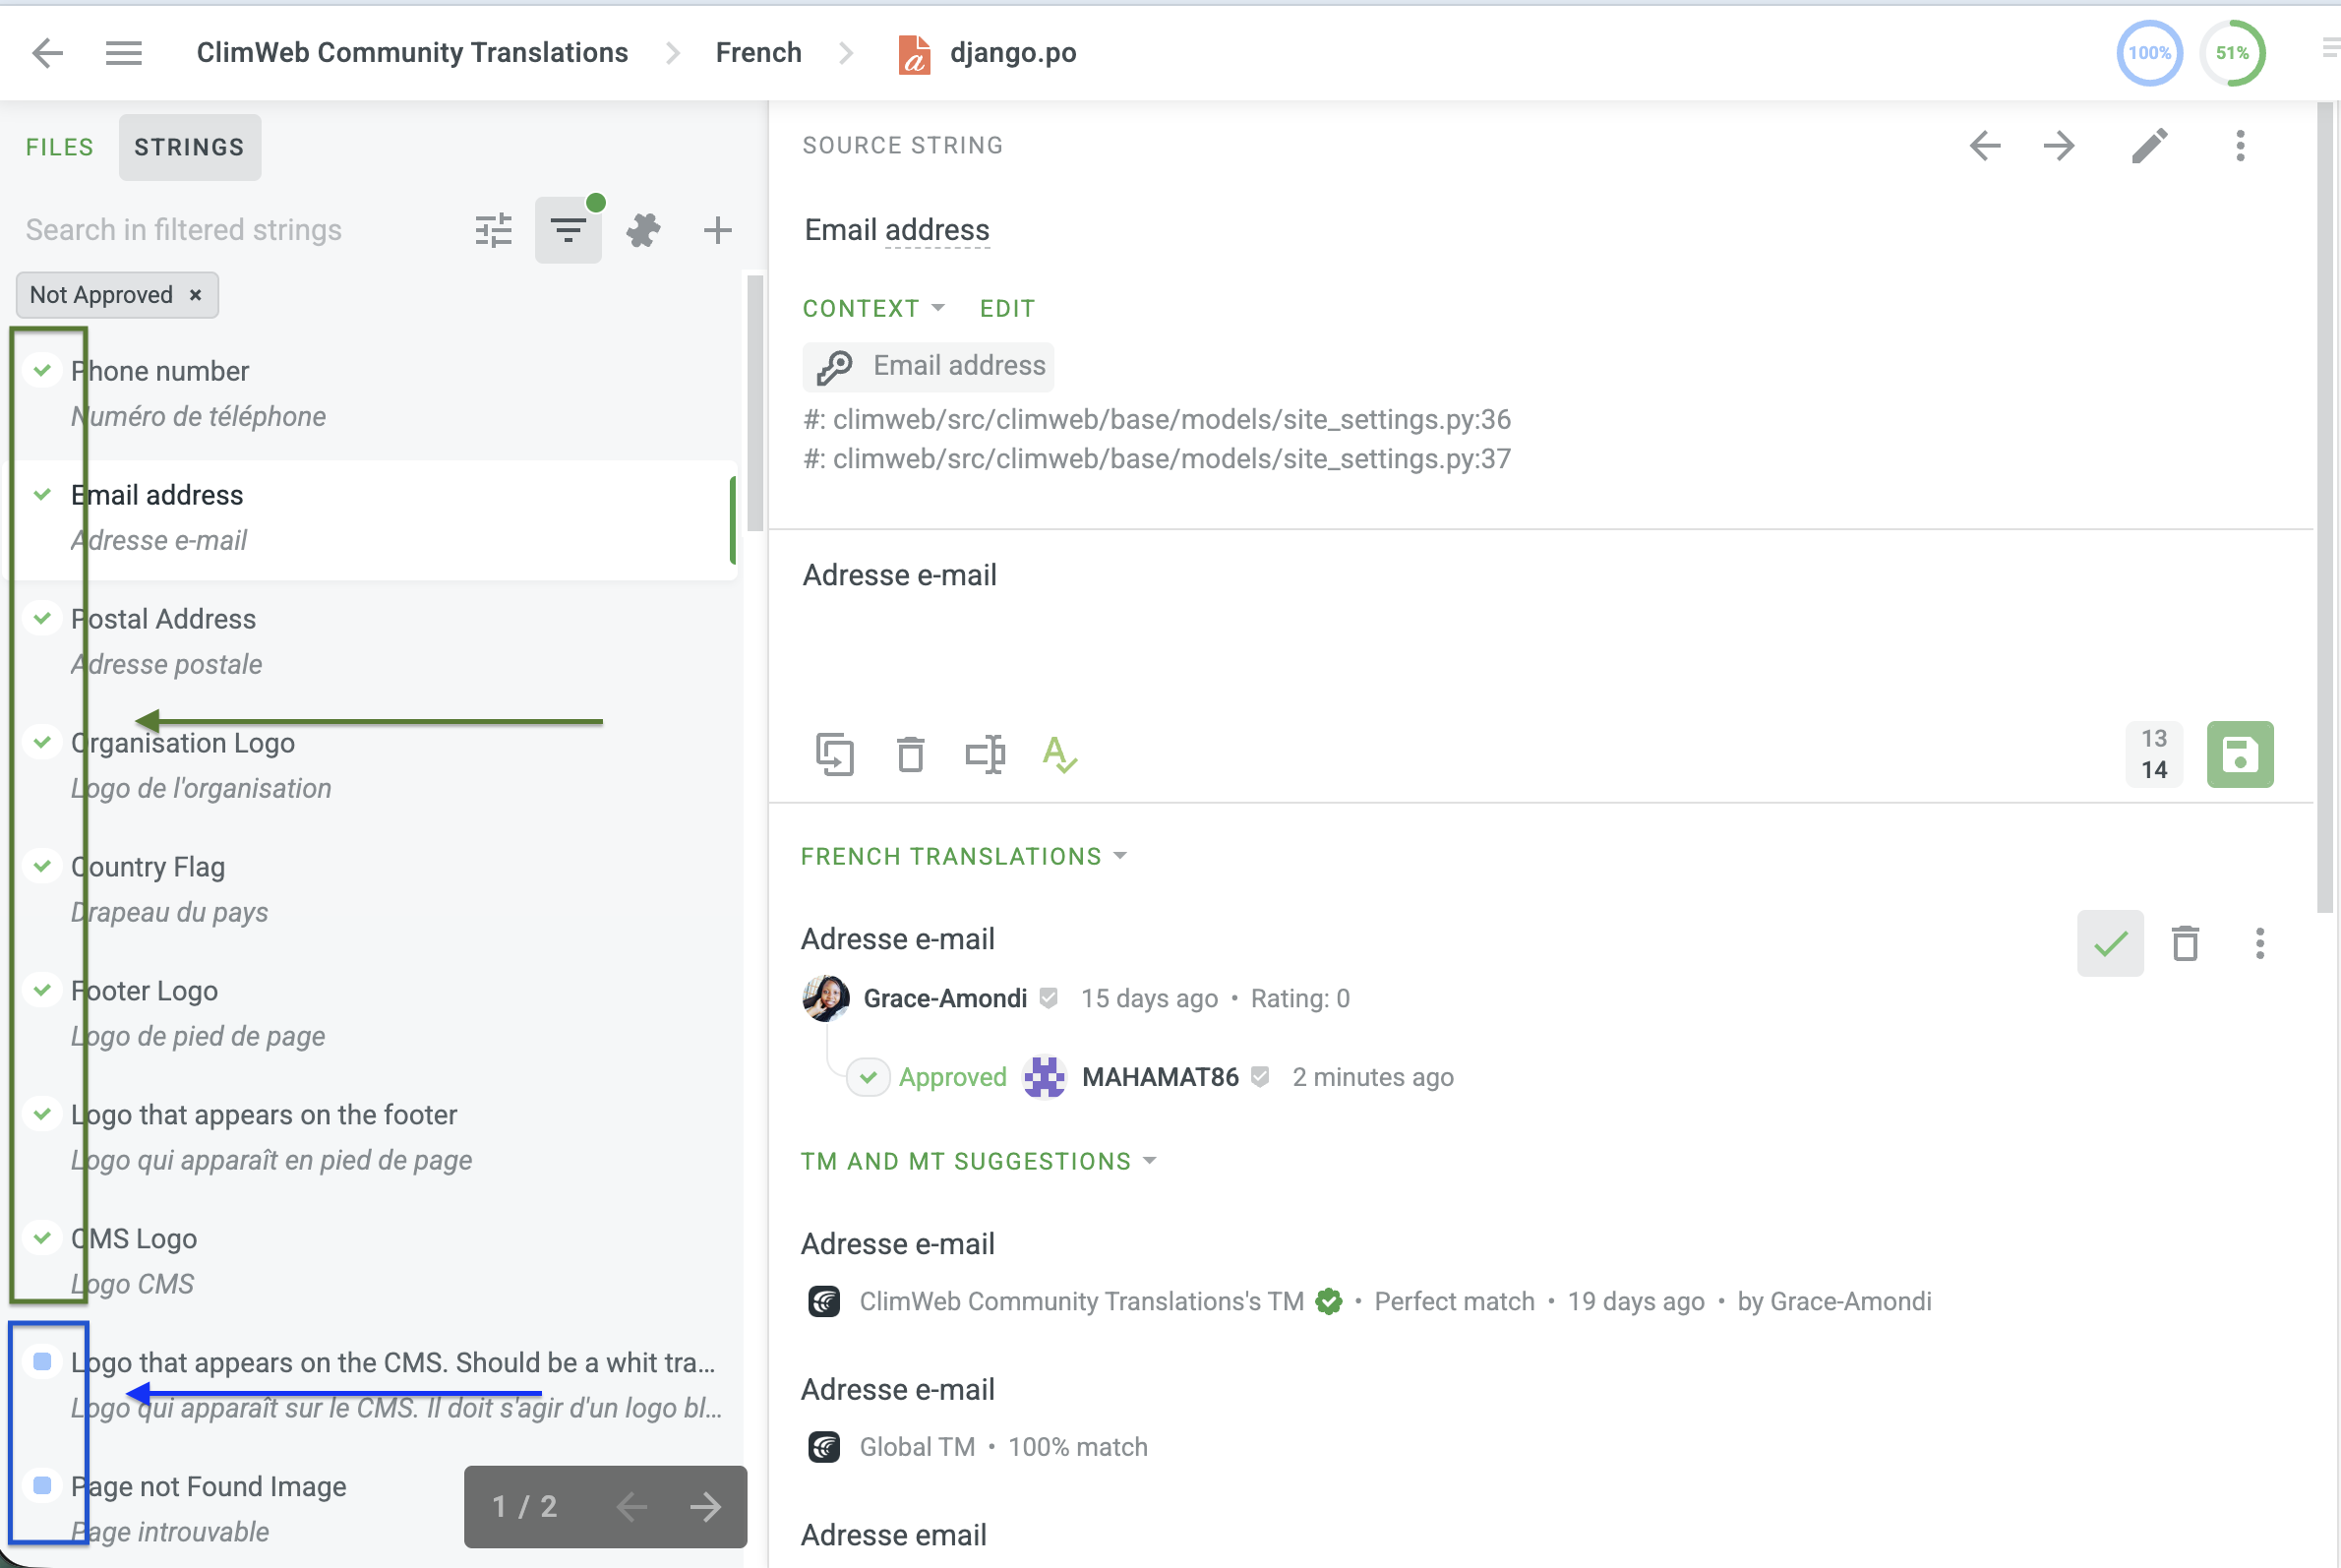
Step 5: Understand the Editor Layout
Left panel — The files for translation showing the progress of translation and approval progress in percentage
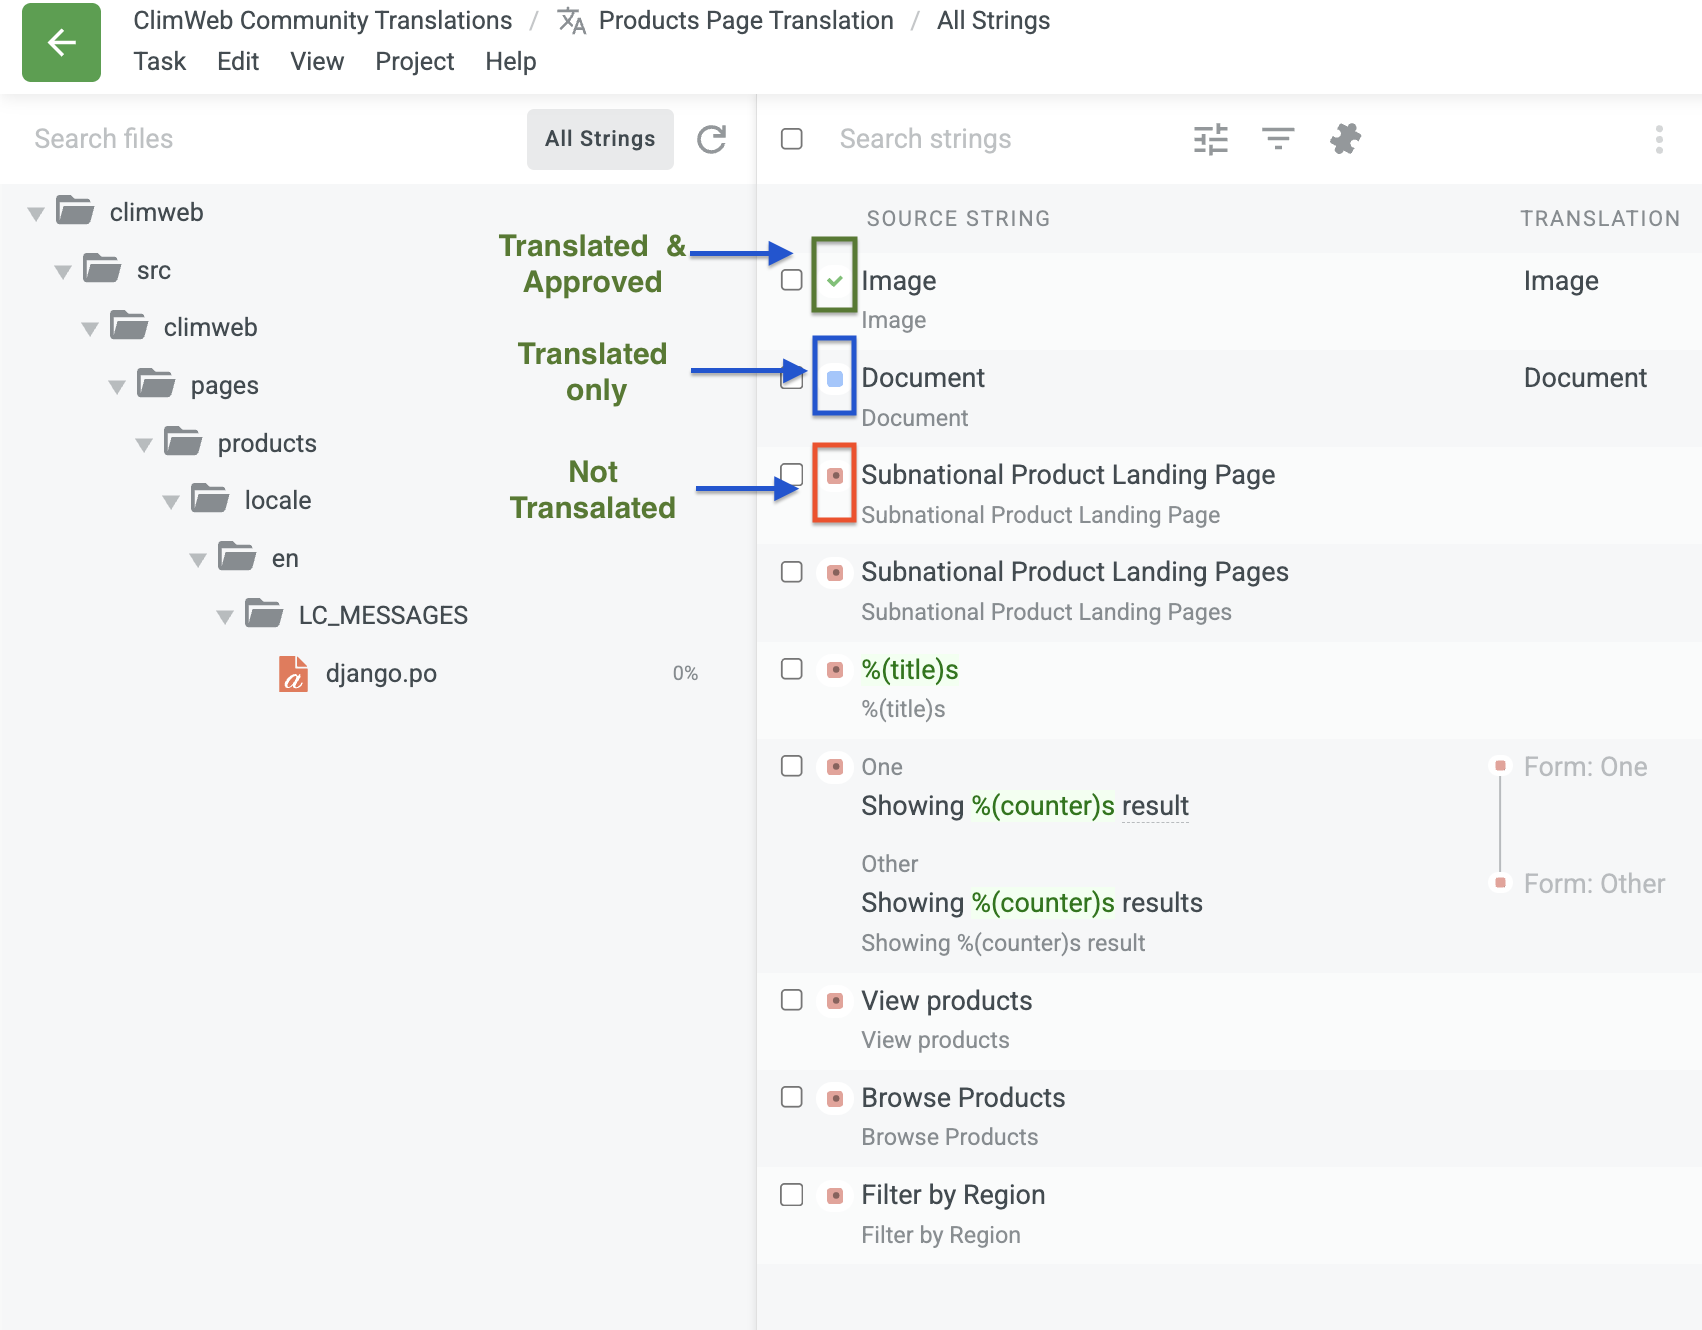
Centre panel — The list of strings (phrases or sentences) waiting to be translated. Untranslated strings are shown first. (Red means untranslated, Blue means translated but not approved, Green means translated and approved)
Right panel — The active string. You’ll see the original English text at the top, and a text field below where you type your translation. It also contains suggestions from Translation Memory (TM), Machine Translation, and the Glossary to help guide you.
Step 6: Translate a String
For the selected file, click on a string in the centre panel to select it.
Read the English source text carefully in the centre panel.
Type your translation in the text field below it.
Press Enter or click the green Save button to submit and move to the next string.
Tip: Watch for variables like
%1,{name}, or0— do not translate these. Copy them exactly as-is into the correct position in your translation.
You can also click a TM suggestion on the right panel to pre-fill your translation field, then edit as needed.
Step 7: Use Suggestions Wisely
Crowdin offers several aids to help you translate faster and more consistently:
Translation Memory (TM) — Shows how similar strings have been translated before. A 100% match means the exact same string was translated previously. Use these as a starting point but always review them.
Machine Translation (MT) — Automatic suggestions from engines like Google Translate or DeepL. These can be helpful but always need human review and editing.
Glossary — Highlighted key terms with approved translations. Always use glossary terms for consistency across the project (e.g., specific climate or weather terminology).
Step 8: Working with Tasks
Project managers may assign you specific Tasks — these are focused batches of strings that need to be translated or proofread by a set deadline. Tasks help the team coordinate effort and prioritise what gets done first.
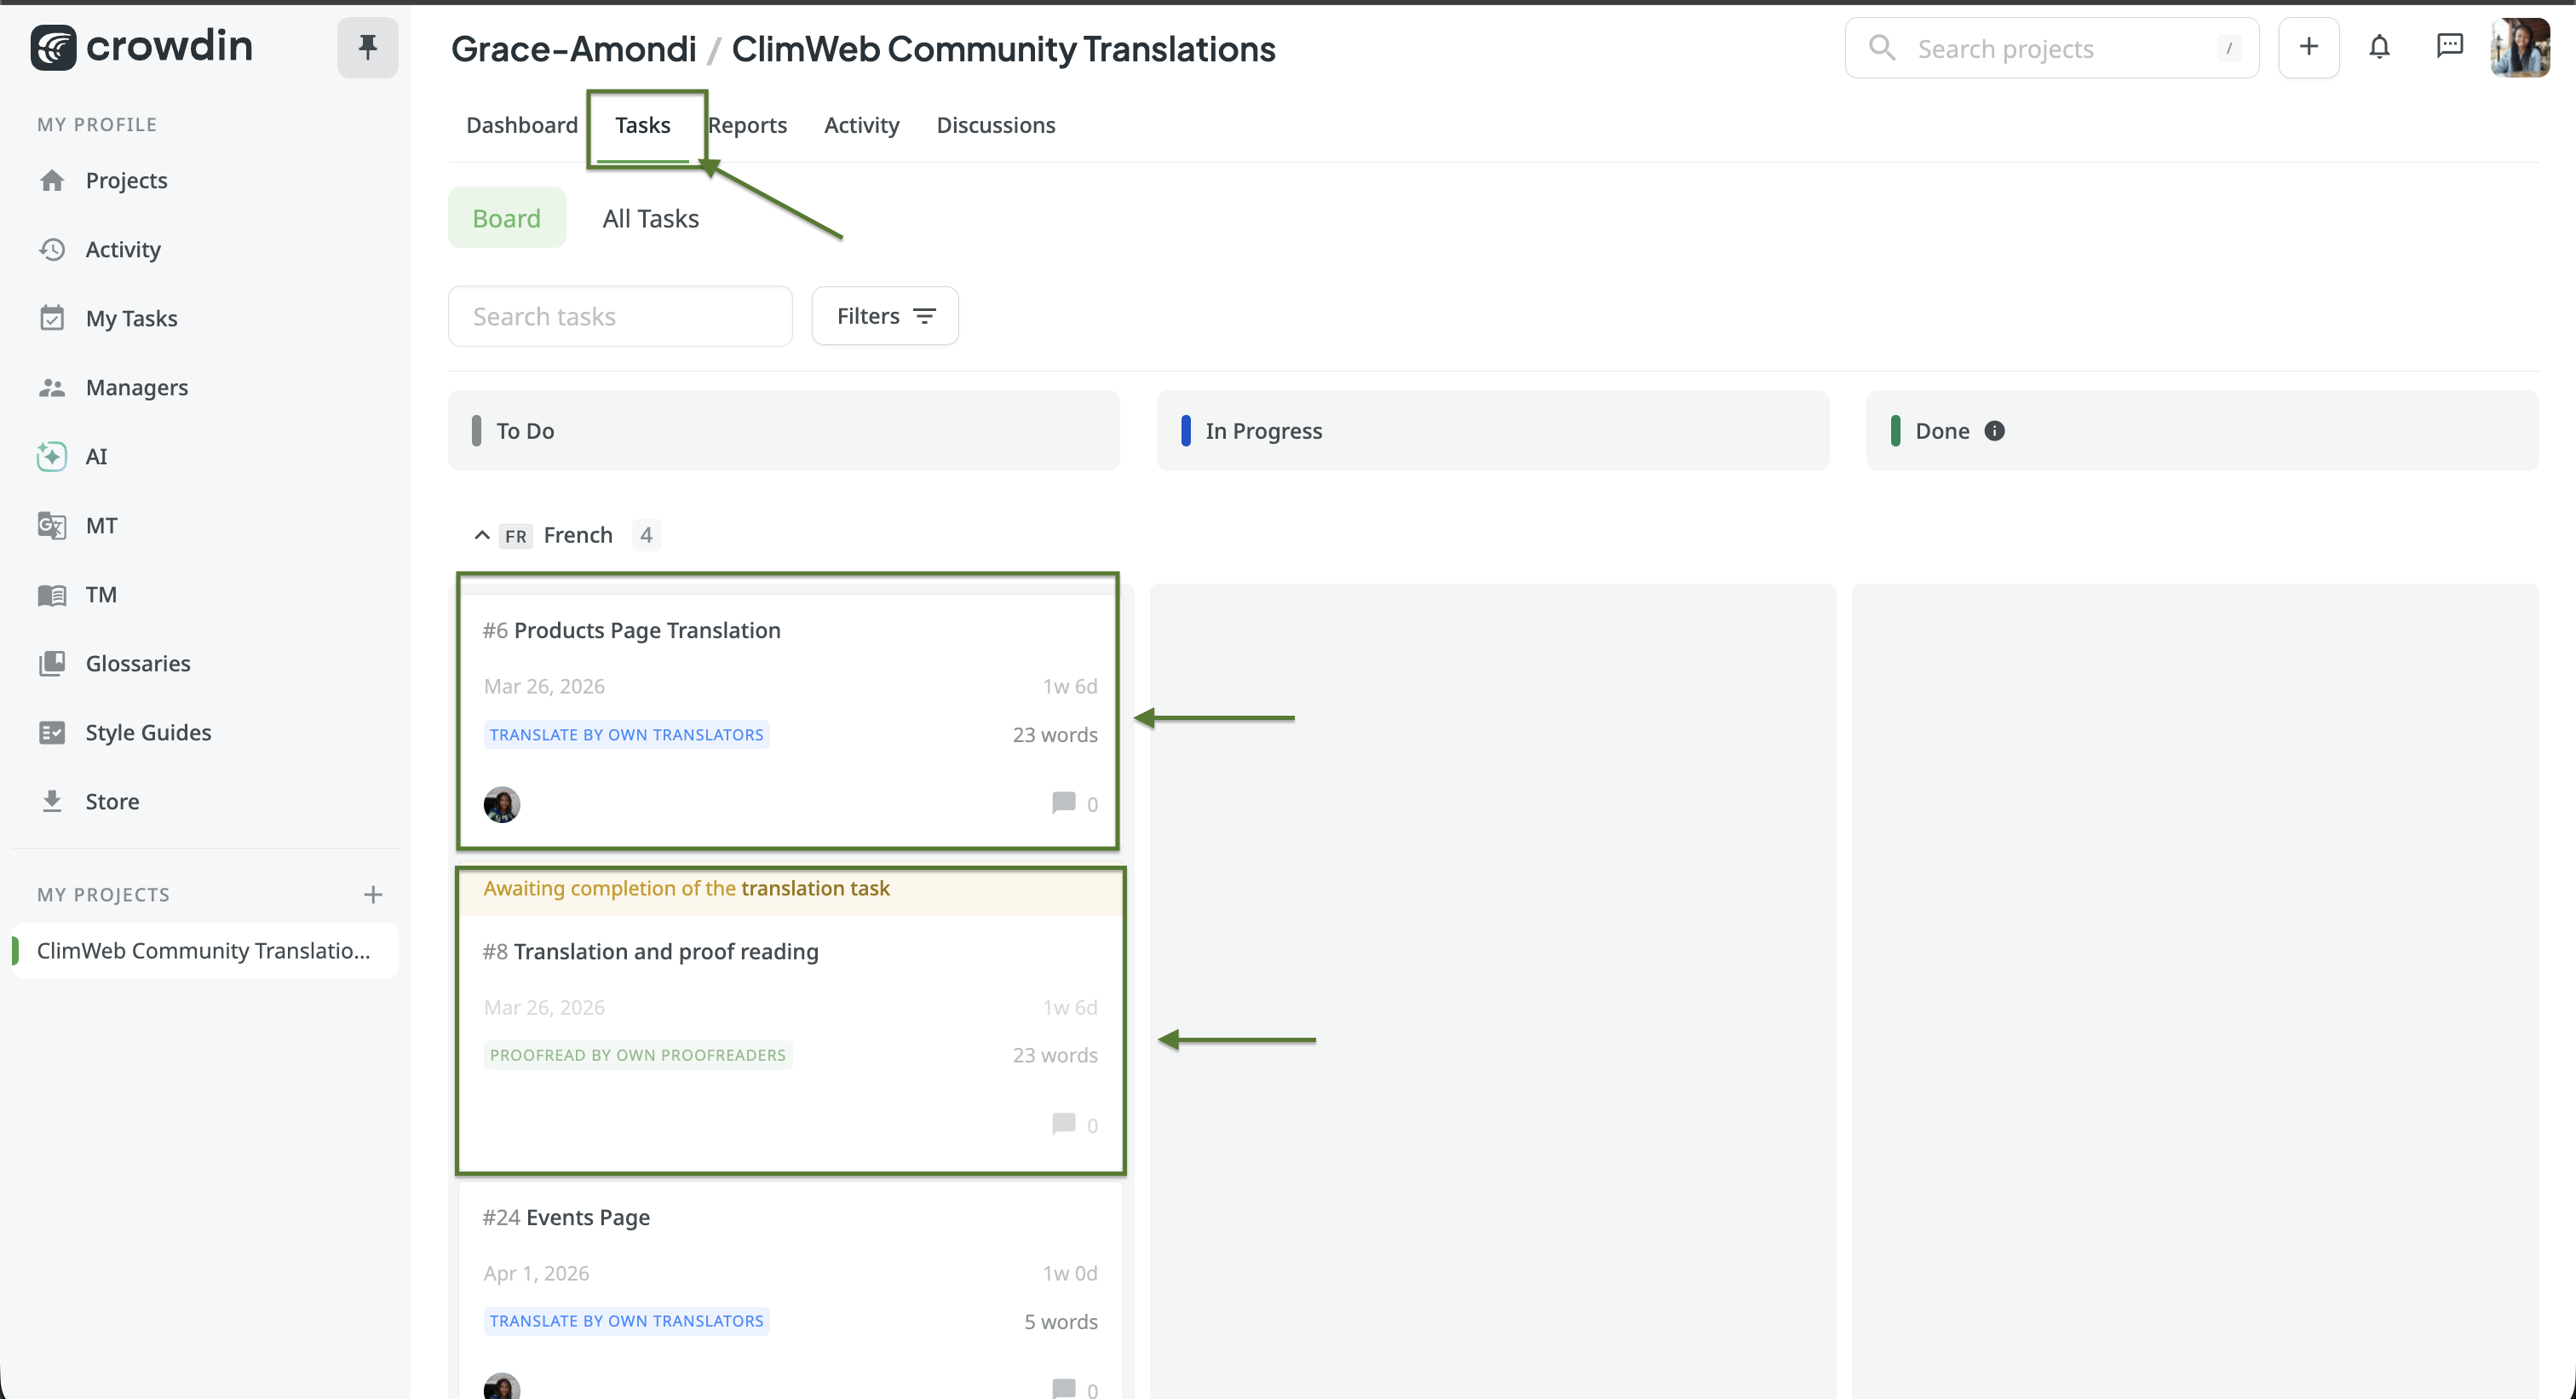
To find your tasks:
Go to the Tasks tab on the project Dashboard.
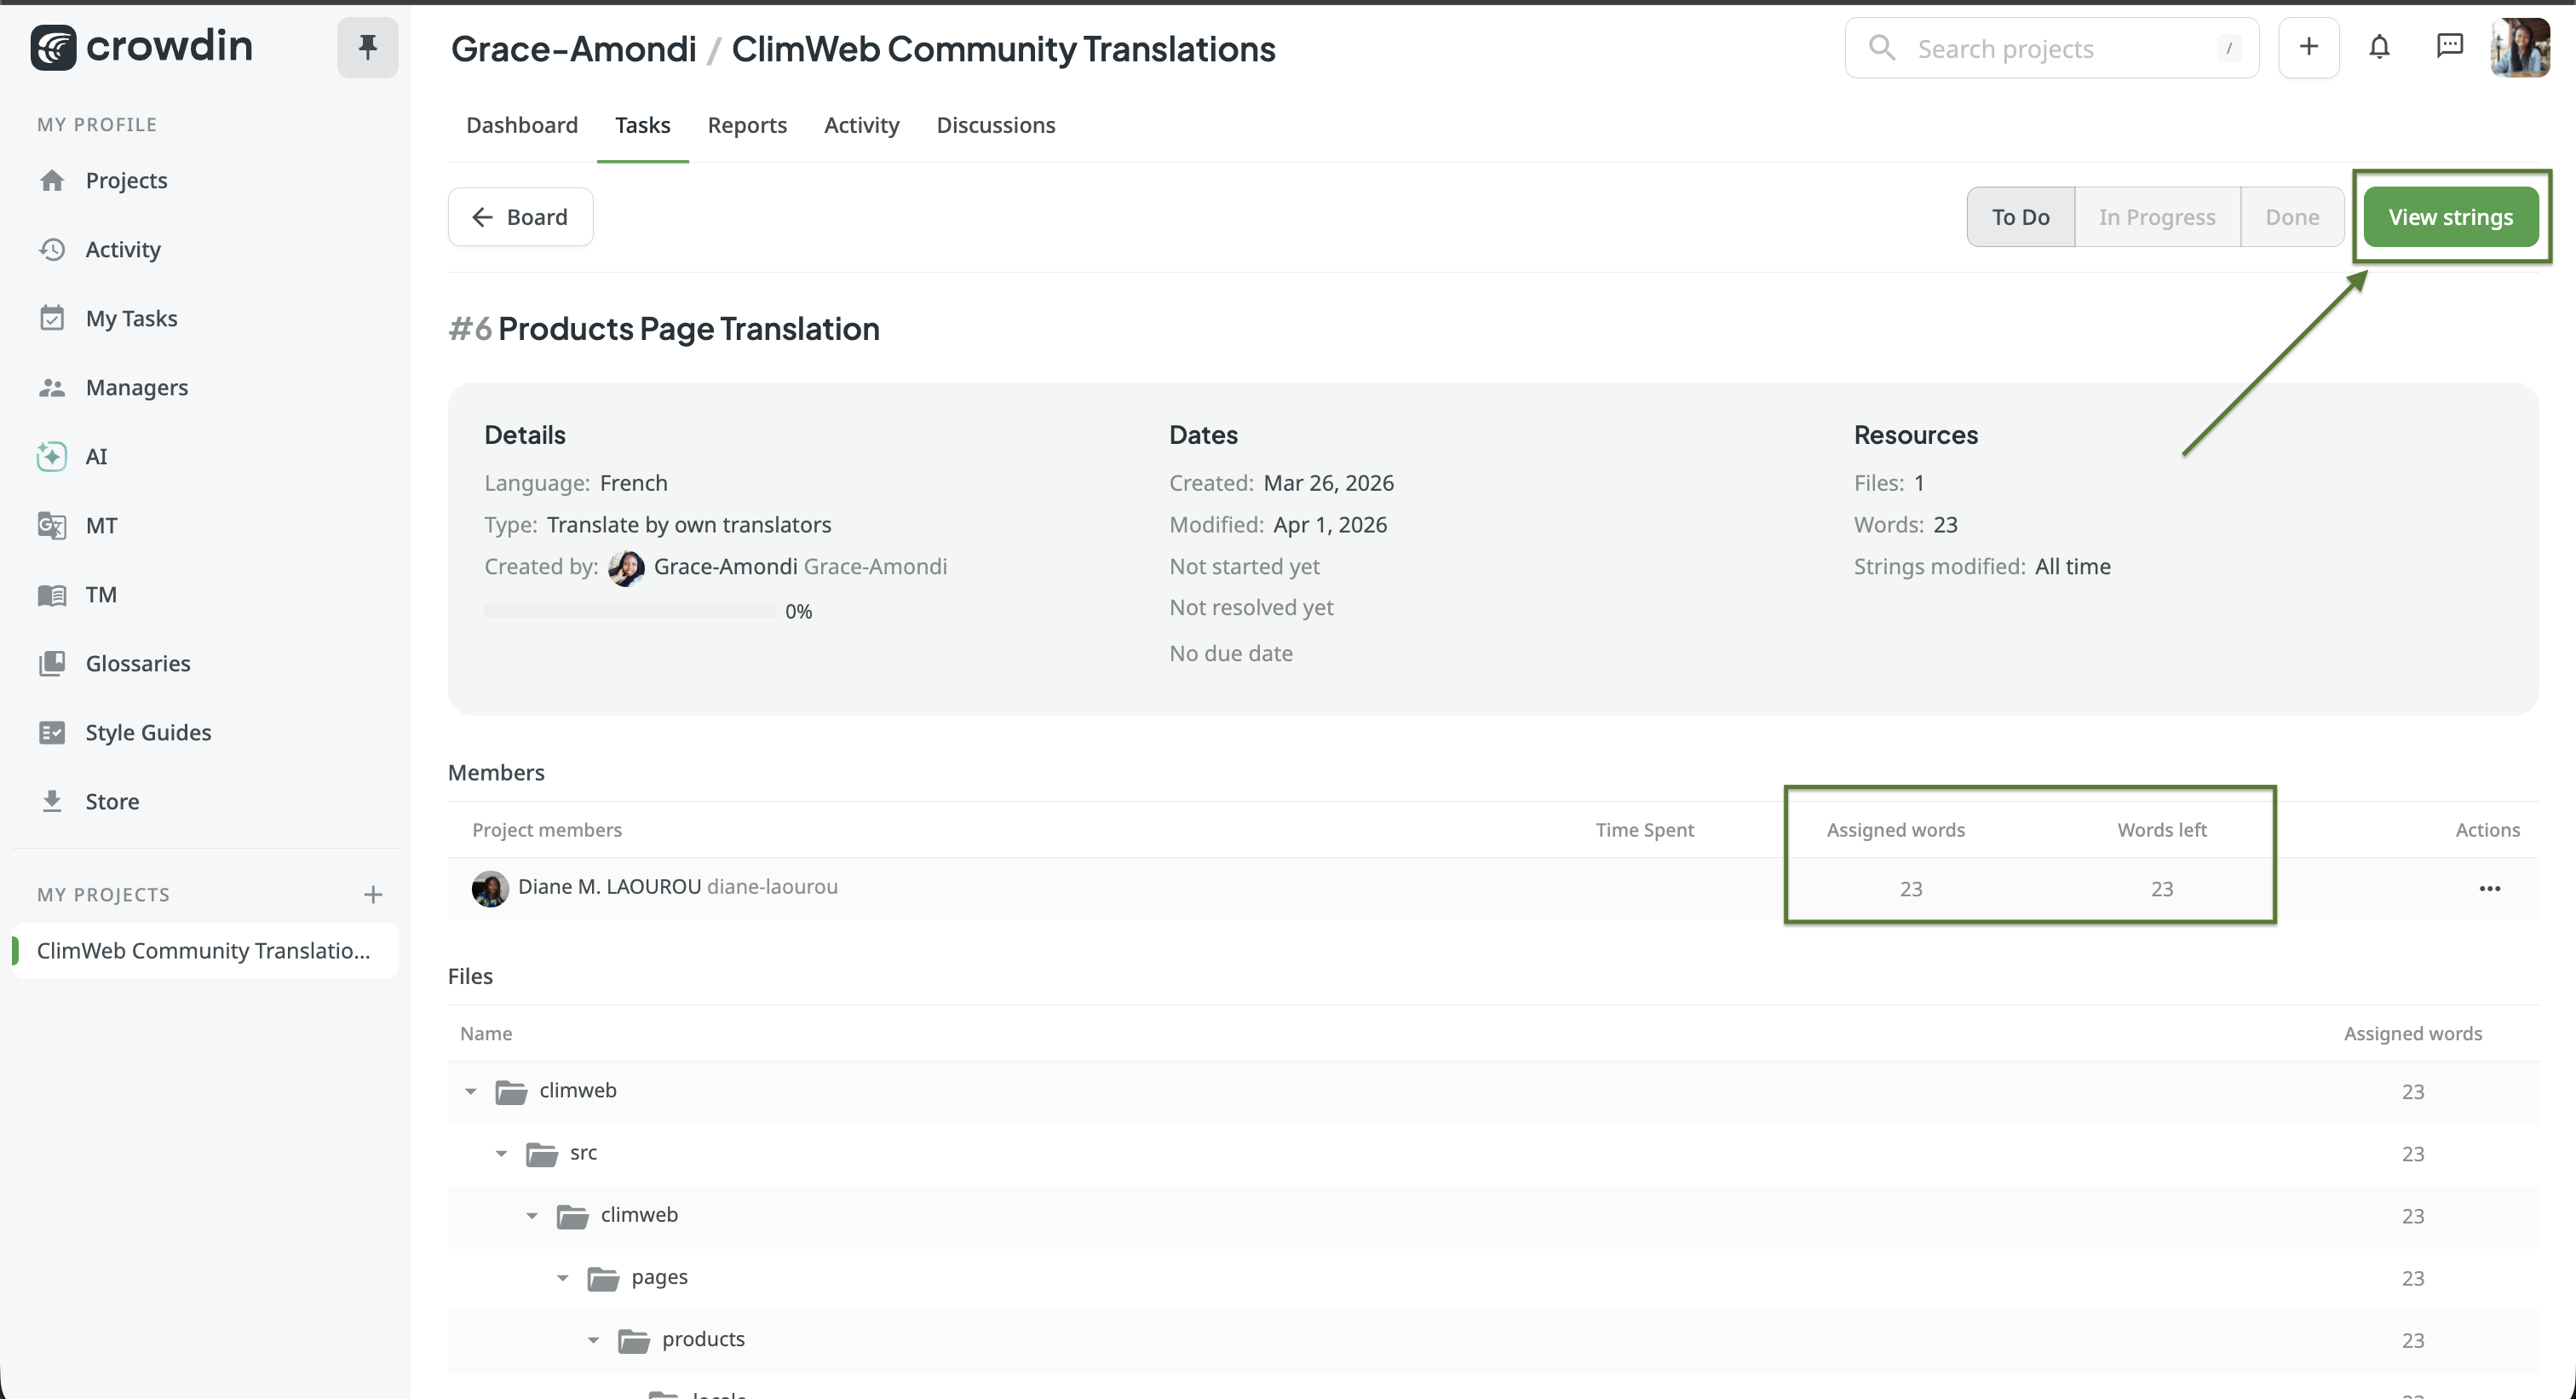
Click on a task to see its details — the assigned language, deadline, and the specific files or strings included.
Click Open in Editor or View Strings button to start working on the strings within that task.
Your progress is tracked separately per task, so the team can see how much has been completed.
Tip: Always check the Tasks tab first when you log in. Assigned tasks usually have deadlines and should be prioritised over general open contributions.
If you have not been assigned a task yet, you can still contribute freely by selecting a language and translating any untranslated strings — every contribution counts!
Part 3 — Proofreading
Note: Proofreader access is granted by project managers. If you’d like this role, reach out to the ClimWeb community coordinators.
Step 9: What Proofreaders Do
Proofreaders review translations submitted by translators and give them the final approval to be used on the ClimWeb platform. One can have both translator and proofreader previlleges. As a proofreader, you:
Review completed translations for accuracy, grammar, and naturalness.
Click Approve (✓) on strings that are correct.
Approved tasks will have a green tick and tasks awaiting approval will have a blue square dot.
Edit and correct strings that are inaccurate before approving.
Leave comments on strings to explain changes or ask the translator a question.
Step 10: Approving & Editing Strings
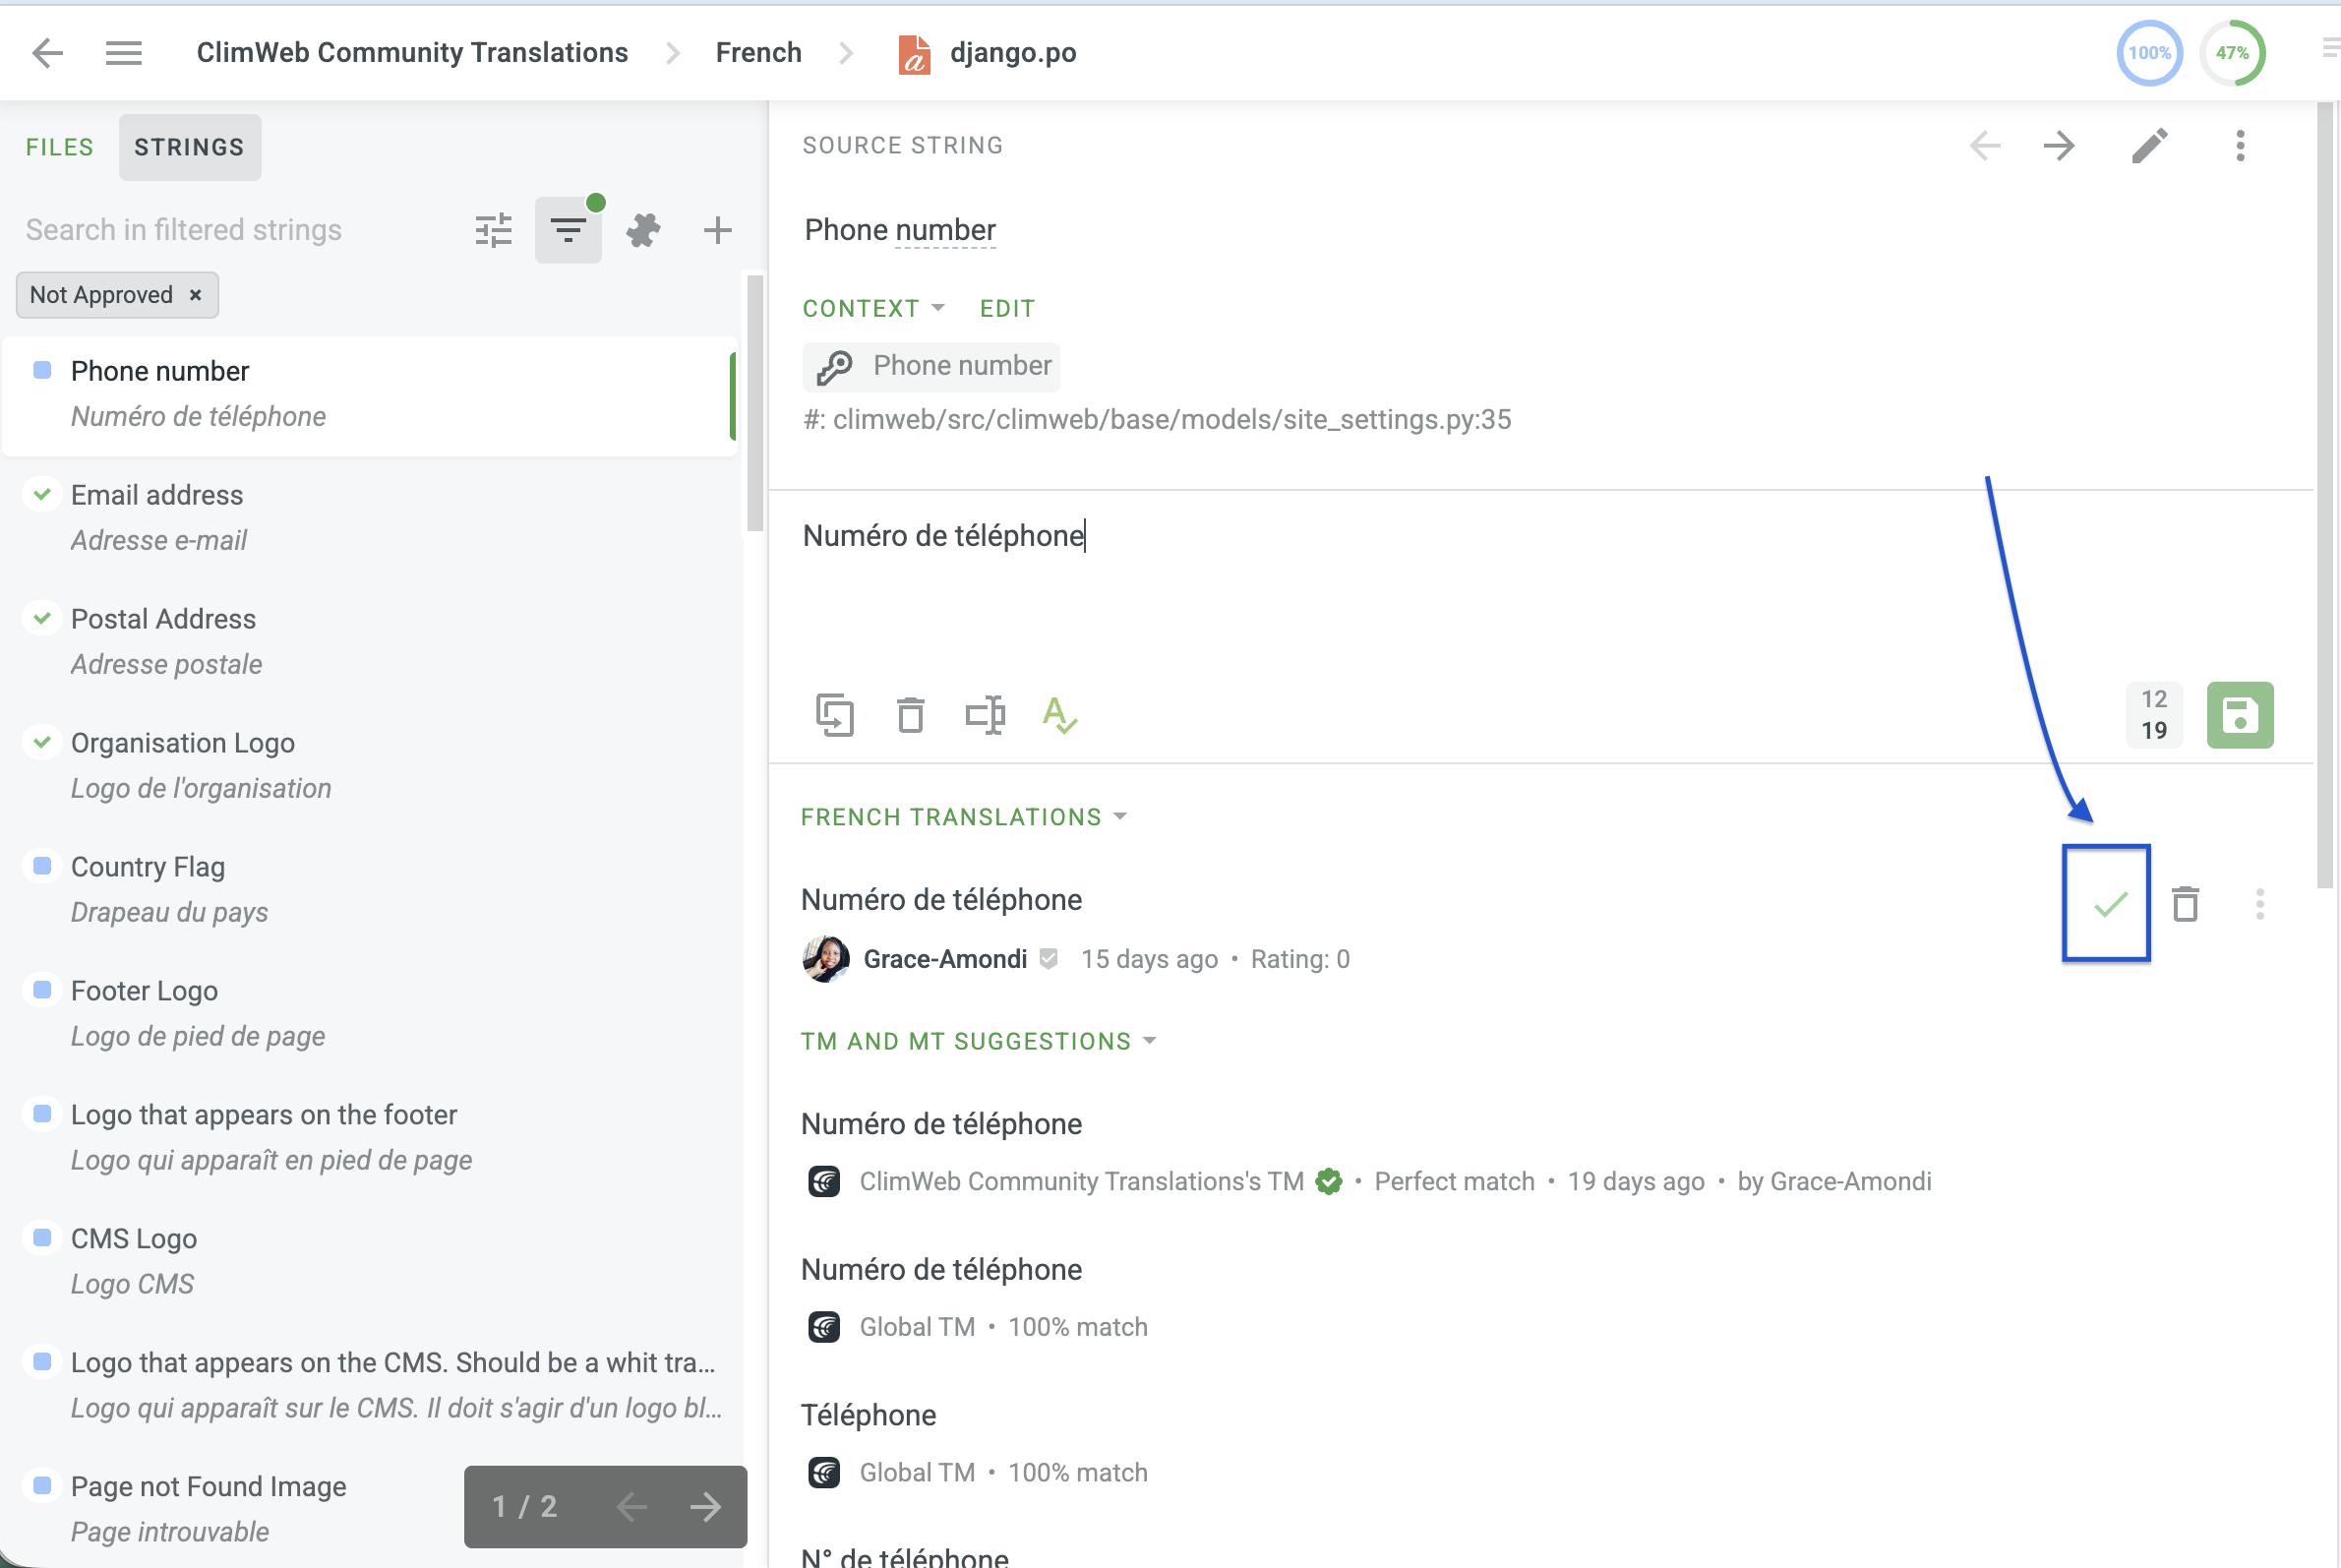
Switch to Proofreading mode in the editor using the mode selector at the top.
Strings awaiting approval will be highlighted — read each translation carefully against the English source.
If correct, click the Approve button (✓). The string turns green.
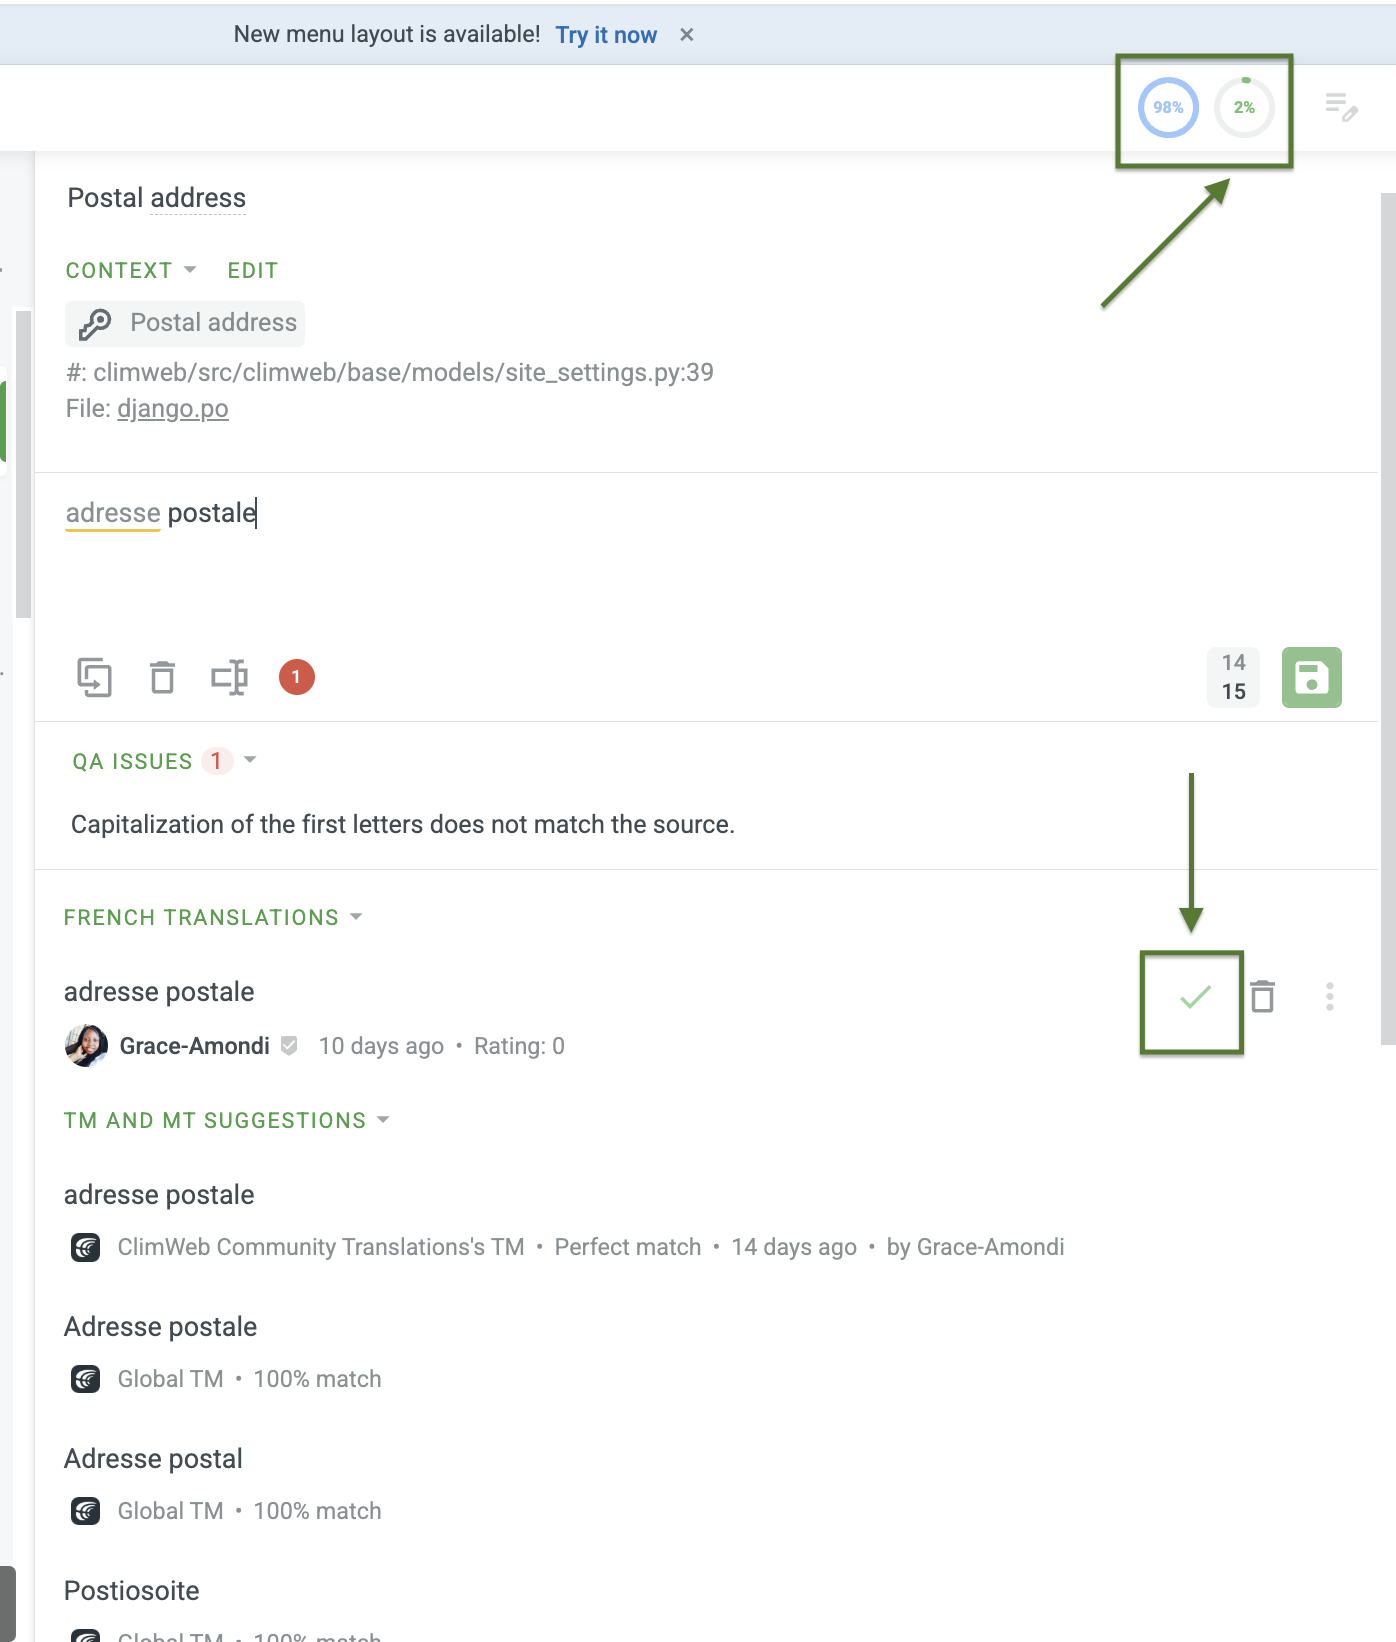
If the translation needs a fix (usually appears under QA Issues), click on the translation text to edit it directly, make your changes, then approve.
Use the Comments tab on the right to leave notes for translators — this keeps feedback transparent and constructive.
Best Practices
Tip |
|
|---|---|
1 |
Keep climate terms consistent. Always refer to the Glossary for weather and climate-specific vocabulary. |
2 |
Don’t translate variables. Placeholders like |
3 |
Use the Discussion tab. Not sure how to translate something? Post in Discussions to get input from the community. |
4 |
Sound natural. Translate the meaning, not word-for-word. Your translation should read as if it were originally written in your language. |
5 |
Check screenshots. Screenshots show where a string appears in the UI — use them to understand context before translating. |
6 |
Review your work. After saving a translation, re-read it once more. Quality matters more than speed. |
You’re all set! Every string you translate or proofread helps make ClimWeb accessible to more people around the world. Thank you for being a contributor to the community — your language skills make a real difference.
Project: crowdin.com/project/nmhs-cms